Another Immediate Implant Provisional Case

It’s funny how things come in cycles / clusters. Immediate implant provisionals seem to be my “thing,” lately.
I enjoy the challenge, and each case is a bit different.  So, it seems I’m inventing new techniques as I go with each case.

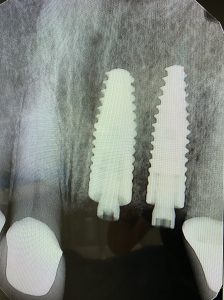
Today’s case is a new patient.  She moved down, mid-treatment, from “up north.”  Her periodontist up north had placed an implant in site #9.  Apparently, #10 had been grafted to prepare for a future implant.   In the mean time, she has been wearing an Essix retainer as a temporary.

Her periodontist up north referred her to a periodontist here, who happened to be “my periodontist.”  And, then my perio referred her to me.  The plan was for my perio, Dr. Gornstein, to uncover implant #9 and place implant #10.  Then I would place immediate provisional crowns on both.

I started with an exam and study models.  I sent the study model for a wax-up of #’s 9 and 10.
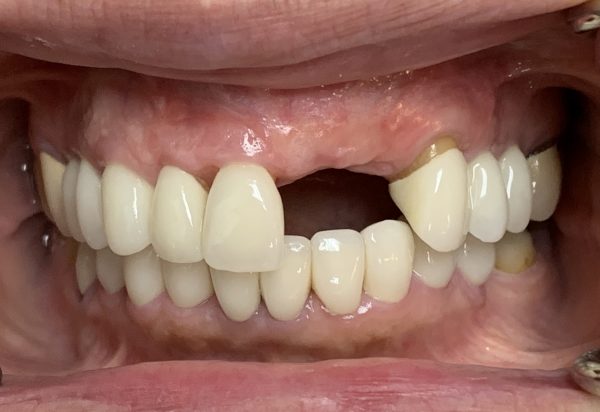
Patient presentation pre-operatively.  She also requested replacement of crown #11.

Instead of getting a wax-up back, I got what appears to be a printed model and a putty matrix (I didn’t request the matrix – usually make’em myself, but OK).
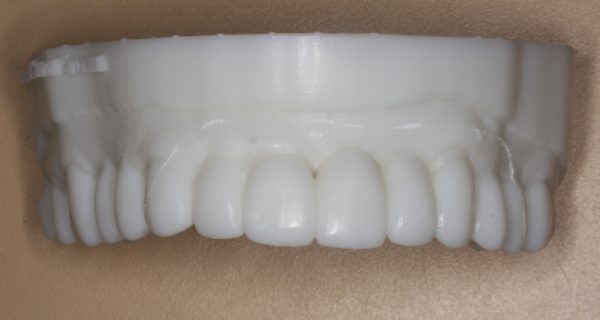
Not bad… but, #9 and 10 are longish. I can correct intra-orally.
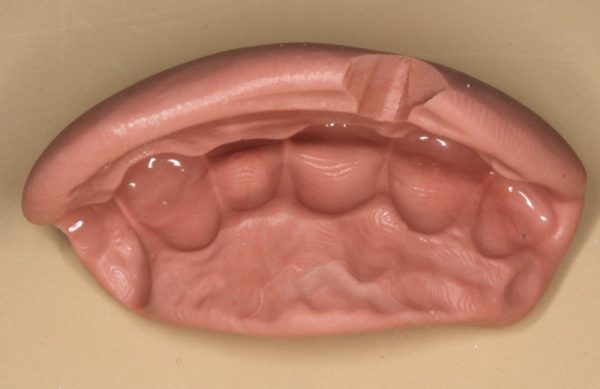
 

Putty matrix from lab.

The appointments were set, and the patient would come directly to my office from the perio.
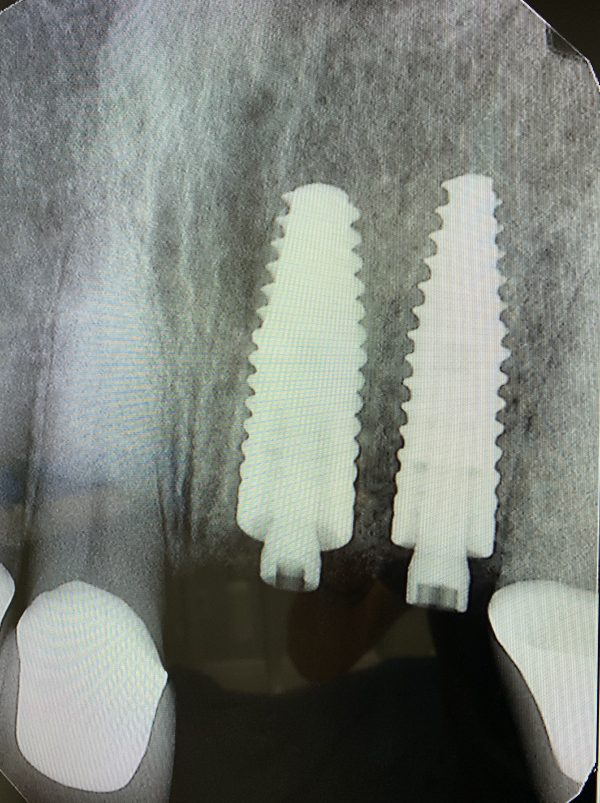
Implant #10 added by my local periodontist.
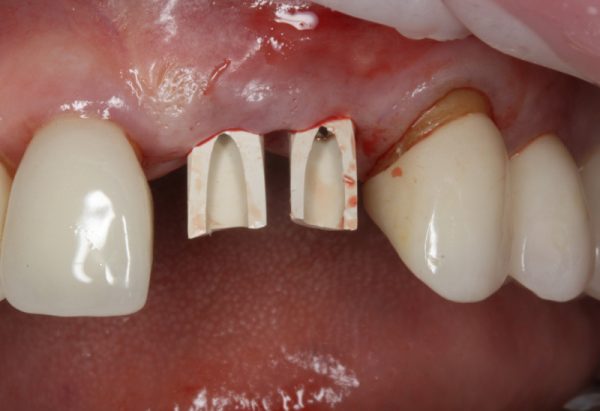
 

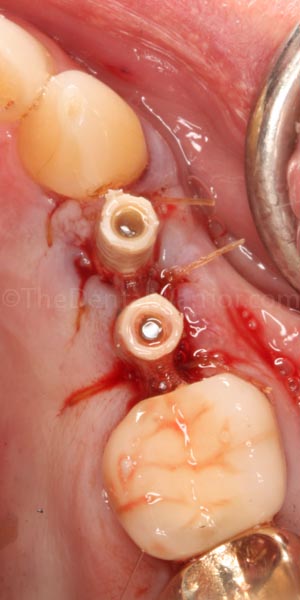
This is how the patient presented at my office immediately post-surgery.  The periodontist provided the “PEEK” temporary abutments.
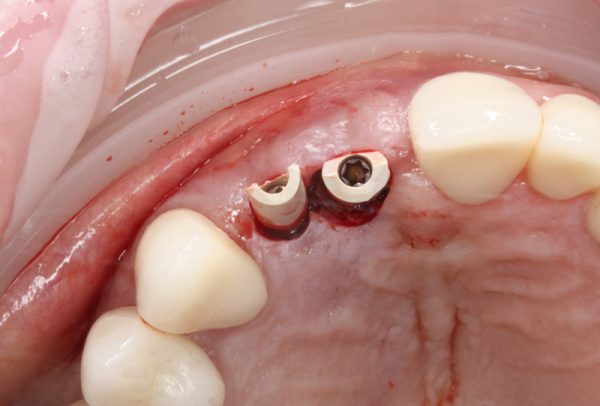
 

Occlusal view immediately post-surgery.

As I initially examined the surgical result, I didn’t think I’d need to reduce the temp (PEEK) abutments, but I wasn’t sure.  The putty matrix is opaque, so with that, I could only “feel” if there was any interference.  But, I wouldn’t be able to see if there was adequate clearance to avoid “show-through” of the abutments in the provisionals.

Then it occurred to me Continue reading

Digiprove sealCopyright protected by Digiprove © 2019-2020 The Dental Warrior®
Posted in Case Presentation, Clinical Technique | Tagged , , , , | 6 Comments

Even Office Staff Need TLD (Tender-Loving-Dentistry)

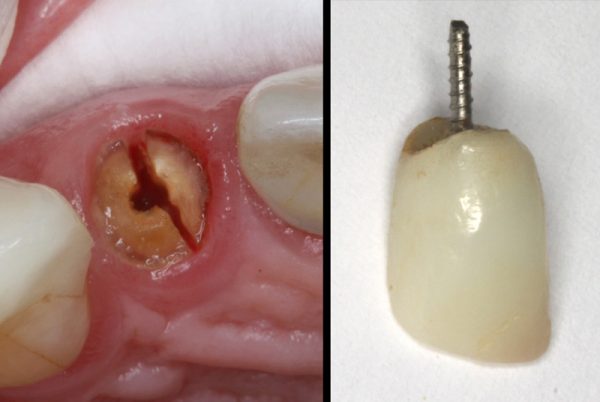
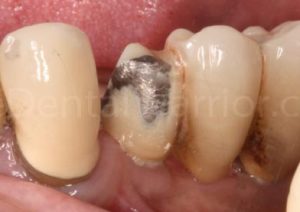
Yesterday, when I arrived at the office, my office manager told me that she felt tooth #7 “crack” and now it’s loose.  At the end of the day, I took a look.  I was able to remove the crown / post with my fingers.  And, then I saw this:

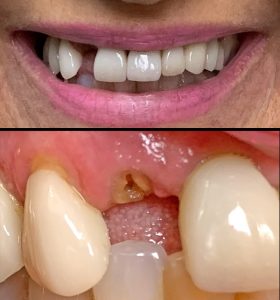
Can’t have this smile greeting patients at the office!

There was no way I could recement the crown, even temporarily.  It was about 4pm, so we made a quick call to our periodontist.  He could fit her in first thing in the morning (today – my office is closed on Fridays).

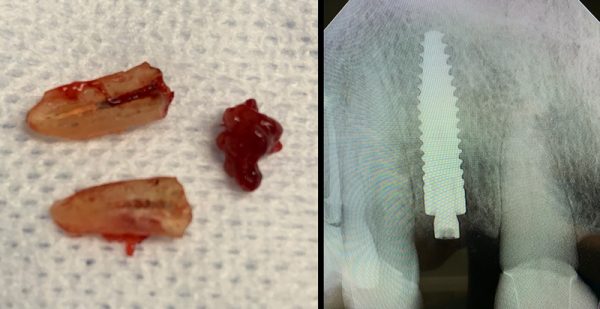
The periodontist was able to remove the tooth and place an implant.  My assistant and I met Jo-Ann at the office at about 10am.  The periodontist’s office is right down the street from mine.

Courtesy of Dr. Russell Gornstein, periodontist.

Here’s what we did: Continue reading

Digiprove sealCopyright protected by Digiprove © 2019 The Dental Warrior®
Posted in Case Presentation, Clinical Technique, What Happened Today | Tagged , | 4 Comments

Using Dental Memes to Educate Patients on Social Media

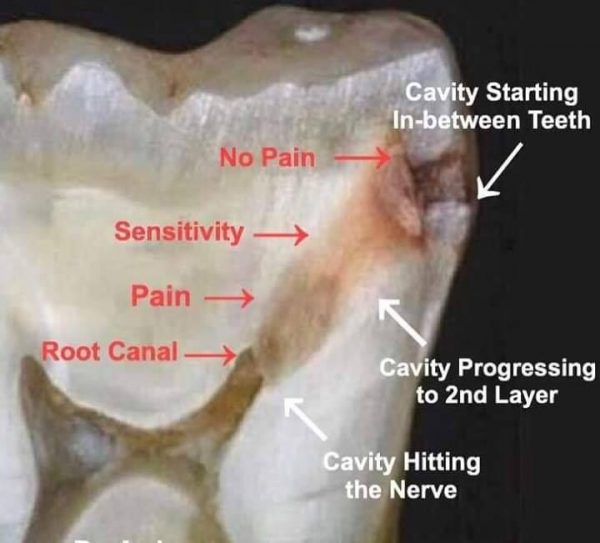
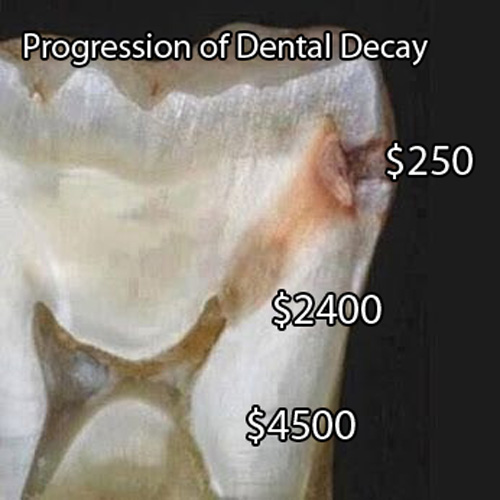
This post will be very short!  Earlier today, a dentist friend posted a dental meme on Facebook, designed to educate patients about the effects of the progression of decay.  I saw it and thought, “That’s pretty good.  I like it.”

My friend’s meme.  To save a copy of this, click the image.  It will open in a new window.  Then right-click and “Save Image As.”

But, then I thought about a different version that might resonate better with the lay public (our patients).

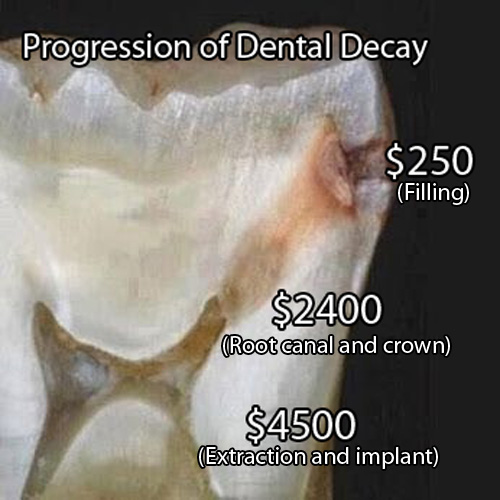
My first modified version.

Then, moments ago, I updated it to this:

I think it helps to include the related procedures.  If you want a copy of this  image:  Click on the image to open in a new window.  Right click and then “Save Image As.”

What do you think?  I posted this on a big Facebook dental group, and it went “viral” (in the dental world).  Within hours, I started to see it pop up on dentists’ practice Facebook pages and in other dental forums.  Feel free to steal this one, if you find it useful.

Digiprove sealCopyright protected by Digiprove © 2019 The Dental Warrior®
Posted in Marketing, Practice Management, Tips & Tricks | Tagged | 5 Comments

Strive for Perfection. Be Happy with “Darned Good.”

Dentistry is demanding in many ways.  It’s physically demanding.  It’s mentally demanding.  Dentists have to wear a lot of hats.  We are the primary producer in a business.  We are the doctor.  We are the manager.  We are the CEO, and we change light bulbs.

Never perfect!

When it comes to the actual dentistry, many of us can be perfectionists and our own worst critics.  I think that stems from the “beatings” we took in dental school.  I remember being told to change the pulpal floor of my first Class 1 prep by a QUARTER-MILLIMETER.  I thought the instructor was full of shit (well… most of them WERE!).  But, now a quarter-millimeter is a “mile” in my eyes.
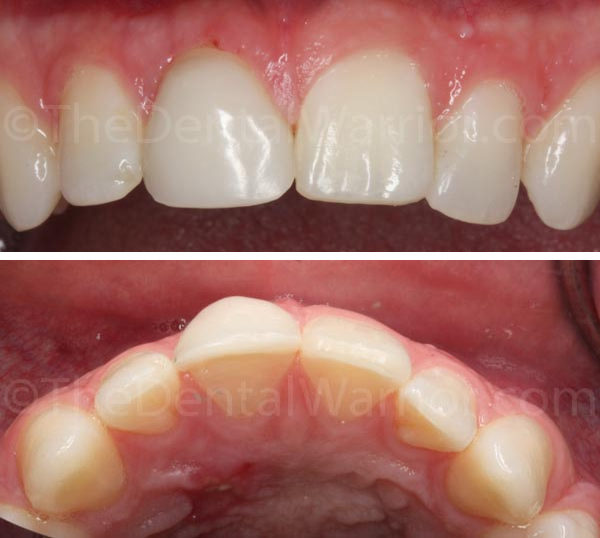
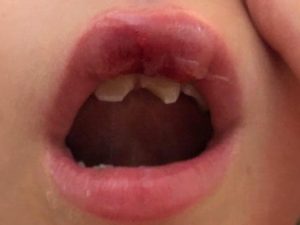
Restoring anterior teeth is probably the most demanding procedure we do.  There is a LOT riding on the result… whether it’s one tooth or all of them.  The anterior teeth “enter the room first,” so to speak.  If something isn’t right, it stands out… big time.  The anterior teeth are important socially and psychologically for the patient.  They’re important, functionally, with occlusion and eating.  They’re even important in speech.

Here’s an example of an anterior restoration gone wrong (at another office).  I presented this case (a new patient consultation) in my blog about “Putting Out Fires.” You can click on the image to see that article.

Mission Critical!

So, when a patient comes in with a broken upper central or lateral incisor, it’s a BIG deal.  When that patient is an 8 year old girl, it’s critical!  It’s critical to her AND her parents.

Last Friday, I got a text from a local colleague.  A friend’s 8 y.o. daughter fell face-first on a tile floor and fractured both upper central incisors.  My colleague is an extraordinarily-gifted dentist, but he doesn’t see children.  So, he referred the family to me.  There was no pulpal exposure (by her dad’s estimation), so we scheduled her for Monday.

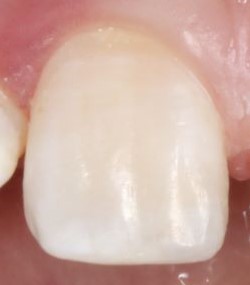
This is the photo, Dad sent by text.

On Monday morning, Dad and 8 y.o. daughter came to the office.  Continue reading

Digiprove sealCopyright protected by Digiprove © 2019 The Dental Warrior®
Posted in Case Presentation, What Happened Today | Tagged , | 4 Comments

OnTarget Shot Group Calculator Software – a shooter’s review

I thought I’d do a quick review of a software program I’ve been using to analyze my precision rifle target groups.  It’s called OnTarget.”  If you want to skip the “intro” or “review” of what shot group size means and want to get right to the OnTarget shot group calculator software review and demonstration, click here (or scroll down).

How am I doin’?

Click on image for full-size view. This was a 300 yard target with 20 shots.  Red bullseye is 3-inches.

A competition or precision target shooter is always interested in measuring his or her performance.  Precision shooters are all about the… well… precision (and accuracy) of his shots.  We take a “group” of shots and measure them.   The tighter the group, the better.  A tight group means the shooter (and the gear) are CONSISTENT.

The size of the group is dependent on a number of factors, including the aforementioned consistency of the shooter and gear (rifle, optics, ammunition, etc.).  Other factors include the distance from the target and environmental factors, such as:  wind, temperature, barometric pressure, altitude, and even humidity.

The BIGGEST variable is the SHOOTER, of course.  😳

But, ultimately, small groups is what jazzes precision shooters.  It’s the same satisfaction as a dentist gets from smooth, sealed crown margins!  😎   Precision shooting is right in the “wheelhouse” of dentists!  It involves science (and math) and a bit of art!

A “primer” on group measurement…

Shot group size is traditionally expressed as an angle.  The shot group is measured in inches (or metric) on the target and then converted into an angular format (the angle formed by two imaginary lines from the borders of the group extending back to the muzzle at the shooting line).  So, it’s converted from inches to “MOA” (minute of angle).  You may recall that there are 360-degrees in a circle.  A “minute of angle” is 1/60th of a degree.  There are 60 “minutes” in 1 degree.  Roughly, a one-inch spread at 100 yards equals one minute of angle.  More precisely, 1.047-inches at 100 yards equals 1-MOA.  Since it’s an angle, the linear spread of the angle gets proportionally bigger as distance increases.  At 200 yards, a 1-MOA group is roughly 2-inches across.  At 300 yards, it’s roughly 3-inches across.  So, a 1-inch group at 200 yards would be roughly 1/2-MOA.  Make sense?

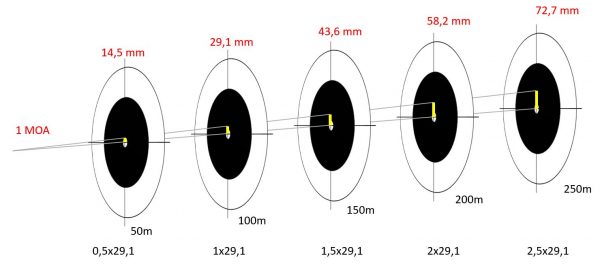
This was the only open-source image I could find online.  The measurements are metric (meters and millimeters), but the concept is the same, of course.  The same angle (1-MOA or 1/60th of a degree) projects a larger spot or “group” as the distance increases.  1-MOA at 100 meters (109.4 yards) would be a 29.1-mm (1.2-inches) group.  At 200 meters (218.7 yards) , it’s a 58.2-mm (2.3-inches) group.  Got it?

Perhaps not coincidentally, a 1-MOA shot group is considered the STARTING of “acceptable” precision performance.  Precision shooters don’t really start to get excited until Continue reading

Digiprove sealCopyright protected by Digiprove © 2019 The Dental Warrior®
Posted in Guns & Knives | Tagged , , , , , , | 5 Comments

Provisionalization of Immediate Implants With Screw-Retained Crowns

It’s been a while since I’ve written, and even longer since I posted a technique / case presentation article.

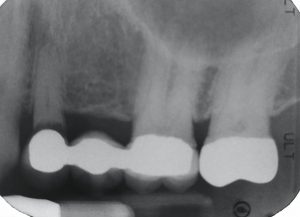
#12 is “FUBAR.” Options were to do a 4-unit bridge or place two implants.

One of my long-time patients had a 3-unit bridge (#12 – 13 – 14) fail due to unrestorable recurrent caries under one of the abutments (#12).  He was given the option of an even bigger fixed bridge or two implants and crowns.  He decided to go with implants.

I made a pre-op study model, so I could make a Sil-Tec putty matrix.  He was referred to a periodontist to extract #12 and section the bridge, saving the existing crown on #14.

The implants were placed immediately, and the patient came straight from the periodontist to my office.  The periodontist had placed two temporary abutments (plastic “PEEK” abutments from Nobel Biocare) and left them long.

I took a piece of wide Teflon tape Continue reading

Digiprove sealCopyright protected by Digiprove © 2019 The Dental Warrior®
Posted in Case Presentation, Clinical Technique, Tips & Tricks | Tagged , , | 11 Comments

I’m NOT “Lovin’ it.” McDentists Strike Again.

It’s been a while since I’ve written!  Busy with life and uninspired.
Today I saw an emergency patient for a dentist-friend who is out of town.  She’s a new patient for my friend.  A veneer (on #9) that was done in another office (before my friend) just two months ago, came out.  The office that placed it was what I call a “McDentist”…. a local multi-location corporate office that turns over staff regularly, including the dentists.  But, hey…. these McDentists take any and all dental plans.  Their waiting rooms are full, so “they must be good,” right

So, they’re always busy, churning patients through the chairs. Quality and attention to detail?  Bah!  Churn and burn, baby!

It tooth #9 (a single central veneer case), and she’s leaving on an overseas trip Sunday.

Houston, we have a problem.

Here’s the thing…  The veneer was done just two months ago (again, not by my friend and colleague).  The FIRST time it came out was the DAY AFTER it was placed.  Something is VERY wrong, if that happens.  She went back.  They recemented it.  It came out again.  She went back.  Rinse and repeat.  She finally gave up and called my friend (who has seen her husband as a patient for quite some time).

This was the FIFTH time it came out.  Continue reading

Digiprove sealCopyright protected by Digiprove © 2019 The Dental Warrior®
Posted in Editorial, What Happened Today | Tagged , , , | 15 Comments

Designs for Vision Micro EF 4.5x – A Gear Review

I needed more (optical) power, Scotty!

I recently wrote a review about my new Designs for Vision headlight (my old one broke after over 10 years of service).  But, since I was on a roll, I decided to upgrade my DFV scopes, too.

Bigger IS better!  Seeing teeth bigger is simply better, almost always.  I began my dental magnification odyssey at least 20 years ago.  Back then, my eyes were better than 20/20.  But, magnification makes your dentistry better regardless of your youthful “perfect” vision.  I’ve said before, an astronomer with great eyesight still needs a telescope to see the moons of Jupiter.  I started with 2.5x power.  Then 3.5x.  And, now…. 4.5x.

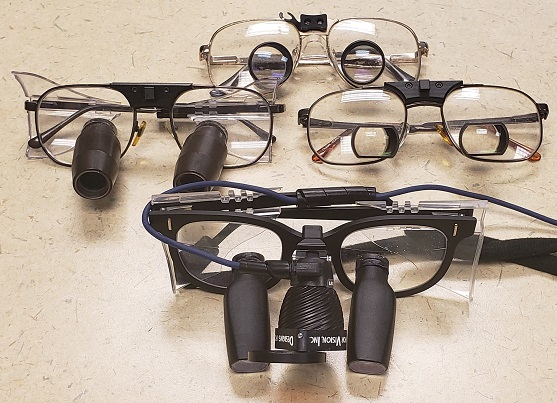
My dental telescope evolution….  BACK ROW: Orascoptic 2.5x. MIDDLE ROW: Designs for Vision 3.5x and Designs for Vision 2.5X. FRONT ROW: Designs for Vision Micro EF 4.5x (and DayLite HDi).

I don’t think I need to beat the “magnified dentistry is better” horse any further.  😀  Hopefully, it is now self-evident.

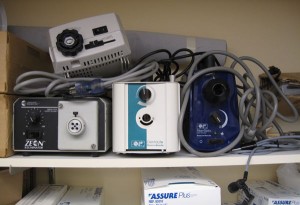
Where dental equipment goes to die. The fiber-optic light box “graveyard” in the supply room.  I went through several fiber-optic lights before I switched to an LED headlight (Designs for Vision DayLite).

My first dental telescopes (aka “scopes”) were a 2.5x through-the-lens (TTL) set from Orascoptic.  And, they worked well for me.  I also got their fiberoptic light, which was a HUGE and loud box.  It was the first step.  But, I realized I wanted more magnification and a back-up set.  I decided to go with Designs for Vision because of their long-term reputation, not just in the dental world, but the medical world.  I got two pairs.  One was a 2.5x TTL.  The other was 3.5x TTL.  I also got Designs for Vision’s fiber-optic headlight at the time.  I’ve previously written about the value of a headlight, especially with the higher levels of magnification.  I feel it is ESSENTIAL.  I recently got DFV’s latest DayLite HDi, and it’s fantastic.

Introducing Designs for Vision Micro EF line of scopes!

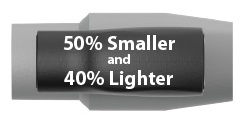
DFV Micro EF lens compared to standard lens of the same magnification power. Courtesy of Designs for Vision.

I’ve been using the 3.5x standard field as my primary scopes for many years now (at least 15 years, I think).   My 2.5x scopes are used mostly in the lab or for quick “look-see” types of exams or study model impressions or other minor procedures.  As I’ve aged and become more picky about my operative performance, I’ve been wanting more magnification.  Designs for Vision recently developed a new line called “Micro EF” scopes.  “EF” means Expanded Field.  They are prismatic lenses, which allow for higher magnification and a larger field of view in a more compact scope package.  So, you get higher magnification and a wider view in a lens that is lighter and smaller…. 50% smaller and 44% lighter, according to DFV.

Oh, what big teeth you have!

I made the jump from 3.5x standard DFV scopes to their new 4.5x Micro EF scopes.  I’ll begin simply by saying, “WOW!”  The difference in Continue reading

Digiprove sealCopyright protected by Digiprove © 2018 The Dental Warrior®
Posted in Dental Product Reviews | Tagged , , , , , | 10 Comments

Dr. MacGyver – Implant Bridge Repair

OK, nothing revolutionary here.  Many of you may have done cases like this.  But, maybe some haven’t.

Patient is a 90 y.o. male.  He broke a big chunk of porcelain off a screw-retained 3-unit bridge, #19 – 21.  The fracture was on #21, taking most of the facial and mesial porcelain off.  This left what would be a big food trap on the mesial of #21, not to mention rather unsightly metal exposure in a semi-cosmetic area of the smile.
I discussed options with the patient, which included:

  • No treatment.
  • New 3-unit bridge.
  • Repair with an “over-crown.”

Together, we decided a repair was a conservative approach.  I explained that the worst thing that could happen is it didn’t work, and we’d be back where we started.  Then, I winked at him and said, “But, it will work.”  I’ve done these before with no failures to date.

I prepped the abutment, removing most, but not all, of the porcelain.  Imagine a 3/4-crown prep with the open side facing the connector to the pontic.  I just prepped to create a path of draw and enough room for an all-ceramic (porcelain fused to zirconia) restoration.

I forgot to get a pre-op photo, so what you’ll see here starts after I prepped it. Continue reading

Digiprove sealCopyright protected by Digiprove © 2018 The Dental Warrior®
Posted in Case Presentation, Clinical Technique | Tagged , , | 13 Comments

See the Light – Be a Better Dentist!

Designs for Vision LED DayLite HDi Review

I have previously written about the value of using magnification and a headlight.  It’s a good time to revisit the idea, as I had to recently replace my headlight.
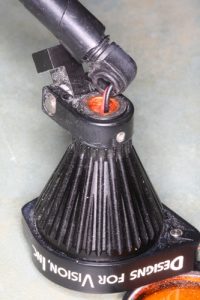
I’ve been using my Designs for Vision “DayLite” along with magnification for many years.  I think it has been at least 10 years that I’ve had the LED DayLite.  It might be more.  I’m not sure.  I may call and ask the folks at DFV and come back and edit this article for accuracy.  Before that, I went through several of the old fiber-optic lights.

Your mission, should you choose to accept it…

I use my DFV telescopes (they’re not actually “loupes,” though that is the popular term) with the headlight every single day… ALL day.  They are what I call “mission-critical” equipment.  They are as essential as my compressor and vacuum systems.  I truly cannot operate without them.  MISSION-CRITICAL.  I would not try to treat patients without them, nor would I be a patient for a dentist who doesn’t use them.  I really wouldn’t.  So, yeah… call me a snob.  I’m cool with that.  🙂

For several months, I’ve been having a problem with my old DayLite headlight.  It was an electrical connection issue between the cable and the battery.  So, the light would sometimes flicker on and off, depending on my movement.  Even if I tightened the cable lock-nut down, it would intermittently cut off.  If I loosened it, it would cut off.  So, I’d have to fiddle with it to keep the light on, sometimes.  It was frustrating to say the least.  But, I hesitated to send it off for repairs, since I didn’t have a back-up.  So, I just “dealt with it.”

Bohemia, we have a problem.

My old, now broken, DayLite.

But, then a couple of weeks ago, I noticed that where the cable connected to the headlamp unit, it was broken!  Oh no!  It was now connected only by the two wires inside the cable.  This isn’t going to last long!  And, I don’t want to be left hanging without a light!  So, I called Designs for Vision (located in Bohemia, NY) and inquired about what to do.  I could return it for repairs, of course.  But, then I’m left with no light!  Or…. I could get a new light… an even BETTER light.

I couldn’t really complain after beating on this light for 10 years or more.

I had already perused their latest product offerings on the DFV website.  They have way more variety in their products today!  I was intrigued by the new “cordless” headlights.  The battery is self-contained in the headlamp unit that mounts on your glasses.  The idea of not having a cable running down the temple of the glasses, back to a clip on the back of my collar, and then down to a battery pack on my belt or in my pocket was attractive.

Thankfully, I had a good discussion about how I use my DFV gear with my sales rep. Continue reading

Digiprove sealCopyright protected by Digiprove © 2018 The Dental Warrior®
Posted in Dental Product Reviews | Tagged , , , , , , | 6 Comments