I’ve been meaning to get this set up in my office and then sharing the idea with you for quite some time. FINALLY, I got around to doing it… the way I wanted to do it. For most of my career, I’ve searched for the holy grail of intraoral photography and a way to share it with a patient in an easy and expedient manner. And, I found it!
Intraoral photography is an essential part of my daily practice.
I’ve been using photography in my practice for around 18 years. I started with a film SLR camera and a separate intraoral video camera (IOVC). 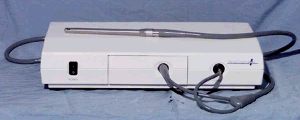 My intraoral video camera was the Acucam Concept III. I paid about $10,000 for it! It was a monstrosity that “traveled” in the office on a big, heavy cart on wheels with a TV on top of it.
 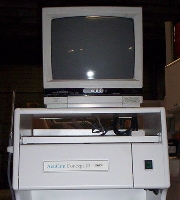 At the time it was state of the art for taking intraoral images and then showing them to the patient. The IOVC was quite good for single tooth images (and single tooth dentistry). But, for shooting quadrants or full arches, it was less than adequate. I find that quadrant and full-arch images are more easily understood by patients.
My film camera was for my own documentation (before & afters, lab photos, etc.). Of course, I had to take the film in for developing and wait a few days. It was a cumbersome system (video and film). It worked (when I used it), but there had to be a better way!
Digital gets good enough for me.
Later (maybe 10 – 12 years ago) I got rid of the film camera and went into digital photography. I initially resisted digital cameras, as the image quality was quite poor (to this photo snob). Early digital photos were very “pixelated.” Film blew it away for the first few years. Digital was not initially good enough for this photographer. But, then it was.
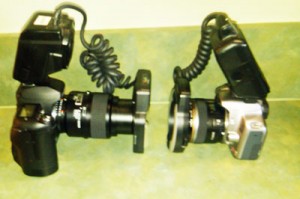
Fuji S2 Pro (RIP) on left. Canon Rebel XSi on right.
The intraoral images captured with the digital SLR (Fuji S2 Pro – RIP) were outstanding and far superior to those captured with the IOVC. I like capturing a quadrant or full arch and then zooming in on individual teeth. I find patients can visualize what part of their mouth we are talking about when they start with at least a quadrant perspective.
 The only issue was showing them immediately to patients. Either I had to use the small screen on the back of the camera (not so good), connect a cable between the camera and a monitor (PITA), or download to my laptop and then show them (time consuming).
I use my DSLR on a daily basis for a variety of purposes including:
- Lab communication.
- Medico-legal documentation.
- Patient education.
- Marketing.
- Before & after photos.
But, I admit when it came to using it for patient education (photos of their own dental condition), I was not consistent because of the inconveniences mentioned above.
I sold the Acucam III monstrosity for $500 to a friend.
Wi-fi SD cards to the rescue!
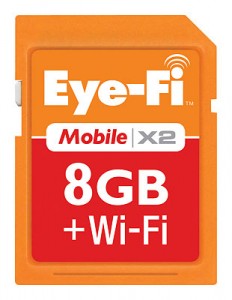 Several months ago, I bought an “Eye-Fi Mobile X2” card for my camera (Canon Rebel XSi). It’s a typical camera memory card with a new twist. It puts out a wi-fi (wireless) signal that can be synched with your computer network or a mobile device. My goal was to have it synch with my office iPad. I wanted to take a photo (of a patient’s teeth) and have it instantly appear on the iPad screen.
When I first set the card up, it worked very well with my laptop. I took a photo in the operatory, and presto.. it appeared on my laptop. This was a big improvement! But, I really wanted to get the photos onto the iPad instantly.
Almost there!
But, since this Eye-Fi card was a new technology, there were apparently some bugs. I just couldn’t get it to work with the iPad. Frustrated, I put the project on the back burner. However, recently, I got some new information on how to set up the “DIRECT” mode for the Eye-Fi card. And, it works! It works very well! And, I’m tickled to finally have what I feel is the best of all worlds when it comes to using photography and patient education. I can grab a quadrant or full arch shot (using retractors and a mirror), and it will instantaneously show up on the iPad. Finally, I can share intraoral images with patients the best way possible.
For patients to “get” the problem, they must OWN it.
My theory is that showing a patient an image on a computer screen on the counter or a monitor up in the ceiling corner leaves the patient a bit “detached” from the image. There’s no emotional “connection” to it. Having the patient HOLD the iPad while I take the photo, and then have it instantly appear on the iPad is a totally different experience (not to mention “wow factor”. By HOLDING the photo in his / her hand, the patient OWNS the image. There’s an emotional connection made that’s more powerful than when viewing an image on a monitor some distance away.
Now we can immediately review the images with patients on a nicely-sized and super-sharp screen. And, the patient is HOLDING and OWNING the dental “issue.” Together we can flip from one photo to the next or zoom in on a particular tooth. Very, VERY COOL!
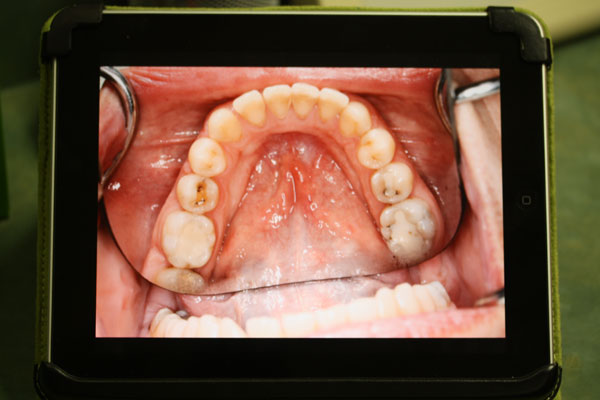
A full-arch photo is easily understood by the patient. It's the "big picture." The patient knows which end is the "front" and which is the "back."
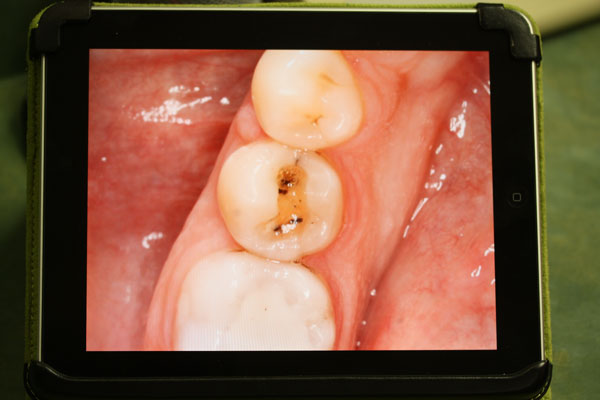
This is the same full-arch shot shown in the previous photo, but now we've zoomed in on a particular tooth.
Must have… MUST have!
You can order the Eye-Fi card on Amazon for about $72: Eye-Fi 8GB Mobile X2 SDHC Class 6 Wireless Memory Card EYE-FI-8MD. Install the software on your laptop and your iPad. To set up the “DIRECT” mode (to zap the photos directly to your iPad), follow the instructions on their website (click link).
Of course, another nifty thing you can do is email the photos to the patient directly from the iPad.
Oh! One last thing! Make sure your camera is compatible with this Wi-Fi card by clicking here for the list.
Let’s see how this all works in real time!
Pardon the amateurish videography and editing. I did this at the end of a busy afternoon before running out the door to go home.
 Copyright protected by Digiprove © 2013 The Dental Warrior®
Great article Mike! I haven’t heard of that one yet.
Thanks for the tips Mike.
I had been using an Eye-Fi at my front desk for quick ID photos. Your iPad transfer is much cooler. Having the patient hold it will totally engage them.
Joe 😀
Does the Eye-Fi iOS app support inverting the images vertically and horizontally?
Good question. I’ll have to check, but I don’t think so. You can also view the photos in the regular iPad photo viewer.
Mike,
I have got the “Eye-Fi Connect X2 4 GB” yesterday. I could reproduce what you did with my Ricoh CX3 and my ipod touch.
I had to format the card before the Ricoh could write on it. Before formatting I did a backup of the card (including the hidden folder).
I have configured the system a bit different: After the transfer from camera to ipod has finished, I switch off the camera and can discuss the pictures with the patient.
In the background my ipod then gets its office WLAN again, automatically (because the WLAN of the Eye-Fi card has disappeared when camera is switched off). The Eye-Fi app on the ipod will then contact the Eye-Fi-program on my PC and starts uploading the pictures to a directory on my office NAS.
I`m only missing a way to erase all pictures in the Apple-foto-app together (or the Eye-Fi-app, they are using the same directory on the ipod) after I have finished discussing them with the patient.
Thanks for bringing this up!
Hello Michael! (My long-time dentist friend in Germany!)
I have a quick question. The Eye-Fi card preferentially chooses a wireless network over the DIRECT mode (to iPad). So, I had to remove all other networks from the Eye-Fi card to get it to do the direct thing with the iPad.
How did you keep the office network on the card AND get it to do the direct mode?
Thanks for chiming in!
Mike, the Eye-Fi card is only configured for direct mode. Once the pictures have arrived on the ipad, the Eye-Fi card is out of the game (switched off with the camera). It`s only a connection between the Eye-Fi-app on the ipad and your PC. You have to configure the Eye-Fi-app for uploading to the PC (upper left corner of App, then “Upload” in my german app). And on the PC the Eye-Fi-Server has to be running for receiving your pictures (called “Eye-Fi-Helper, the orange tray icon). You also may have to configure the automatic upload in the “Eye-Fi-Center” you start from the tray icon. Once the Eye-Fi-Center is running, you click with a right mouse click on the card in the list for devices for configuring it, same for your ipad symbol below. Good luck!
Oh! I see…. wasn’t paying attention. Got it. Well done!
Awesome! I got one of these Eye Fi cards for Christmas and never took it out of the box. I’m going to try it this weekend and if it’s as easy as it looks, I’m going to fly down to Florida and give you a big kiss on the lips!
Thanks for the warning! 😀
Another question, Mike.
Do you need to have an existing wifi network in place to do this? Or does the card create it’s own network?
That’s the cool part. It creates its own network that your iPad will pick up! Turn your iPad on. Click on the Settings and then on WiFi. Shoot a photo, and you’ll see the Eye-Fi card / network show up. Click on it to select it. Then open the Eye-Fi app, and you’re off to the races. Shoot some more photos, and you’ll see them pop up on the Eye-Fi app. But, that app isn’t the best place to view them with patients. Open the native “Photos” app, and you’ll see the photos pop up there, too. But, now you can easily zoom and flip through photos.
Hope that helps!
Pingback: Angry Teeth & Angry Birds | The Dental Warrior
Pingback: DDS GP – Be a Treatment Presentation Ninja! | The Dental Warrior
Do you have an Ipad 1,2 or 3?
How much storage does your ipad have?
I went ahead about bought the wifi card and a 32 gig Ipad 2. I love the idead of the patient HOLDING the ipad and owning their problems.
Hi Michael,
At the office, I have an iPad 1 with the smallest amount of memory. The ONLY reason I got it (originally) was to use the fantastic patient education app called, “DDS GP.” https://thedentalwarrior.com/2011/01/13/dds-gp-be-a-treatment-presentation-ninja/
So, I’m using the same iPad for this purpose.
https://www.dropbox.com/anywhere
I got my IPAD and eyefi card last week. But had to run to the TDA meeting. I took my laptop and used the super cool DROPBOX. It makes my life SO much easier. No more taking a USB memory stick to work to bring files home for me to work on. Everything is updated on dropbox.
I see dropbox is abailable for the ipad.
Description
Dropbox is a free service that lets you bring all your photos, docs, and videos anywhere. After you install Dropbox on your computer, any file you save to your Dropbox will automatically save to all your computers, your iPhone and iPad and even the Dropbox website! With the Dropbox app, you can take everything that matters to you on the go.
dropbox just worked great. You download the free app. My assistant is really good about downloading from the memory card. She simply makes a folder with the patients name in my dropbox, downloads the pictures to it. Once the pictures hit my PC dropbox account all my other dropbox folders on my other computers and devices (ipad) sync.
I don’t have to deal with ipad and selecting what wireless signal.
I might even send my EYE-Fi card back.
Just another tip and option for fellow dental warriors. I can’t wait to have the patient hold the ipad and “own their problem”
You lost me there. 🙂 I also use dropbox for some things (backing up blog, for example). But, I don’t know why you’d return your eye-fi card.
The purpose of the eye-fi card is so when I take a photo with my camera, it IMMEDIATELY goes to the iPad, where the patient SEES it. No removing the card from the camera to load photos into a computer first. Instantaneous, clear image on the iPad the patient can see, touch, and manipulate (zoom, pan).
Thanks again for the wonderful tip!!! I went and bought an ipad and card, and payed for the whole thing multiple times over with the first patient I used it one. I was showing her a large crack with leaking amalgam on #3, and she tried to throw the iPad back to me “Get that ugly tooth away from me!!!!”. Got her and her husband scheduled to place crowns.
That’s great, James! Music to our ears, eh? “Get that ugly tooth away from me!”
Hi Mike,
Thanks for the great article and sharing coolest solution I have ever thought.
One quick question, one of the reason I refrain myself using SLR/DSLRs/Digital Cameras is the flash or light you require inside patient’s mouth to take crisp pictures.
And so intra-oral cameras are so famous because they provide white light and nice focus camera to do the job. However I never liked any of them as the picture quality is not upto the mark.
In your video, I noticed you have some attachment on the camera at the top and on the lenses which probably helping you to take such nice photos.
Can you share some more details about the same.
Thanks a lot once again
Regards,
Dr. Sunayana
Hello Dr. Sunayana,
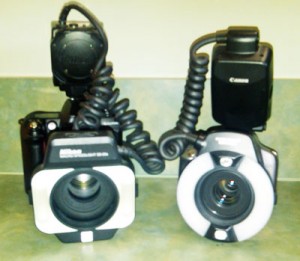
If you’re using a dSLR or other type of traditional camera, a macro flash is essential. The normal flash (on top of the camera or away from the lens) will cast shadows and the light will not reach the subject (inside the mouth). A ring flash or dual lens-mounted point flashes are necessary.
Hey there Michael, I’m trying to get my patient photos to be “in their hands” on the ipad we use for education and training with patients, but I’m not sold on the Eye-Fi speed of transfer. Since you wrote this article, there are canon dslrs that come with wireless connectivity (6D, 60d, etc) and I’m wondering if you found the Eye-Fi to be fast enough or if you think there are better options out there now (as of March 2014). Thanks so much and I enjoy your blog!
Hi Luke,
One of the things I don’t like about the eye-fi is that it transfers ALL the photos that are “in the que” before the most recent photos. So, sometimes I have to wait, which can be annoying. I haven’t figured out how to get around that.
There very well may be better options with newer cameras. I honestly don’t know. But, I’m not ready to buy a new camera, yet. 🙂
Thanks for visiting my blog and for your comments!
Found you seaching for ideas- great site!
Ken
Excellent blog Michael. Thank you! It’s been a couple of years since you first wrote this article and I’m curious to know what hardware you (and perhaps others) currently prefer. Can you tell me please, what Camera/Lens/Flash combination(s) you like to use?
Hi Scott,
Thanks for visiting and taking time to post a comment.
I’ve been using a Canon Rebel XSi with a 60-mm macro lens and Canon ring flash (MR-14??). I’ve had it for several years. Before that, I had a Fuji S2 Pro, which died. I prefer a 100-mm macro lens (don’t have to get as close to the patient).
Thank you for your quick and helpful reply. I’m confused on your lens focal length preference. Do you prefer the 100mm or the 60mm macro lens?
I got the 60-mm lens on the lightweight Canon Rebel XSi, for a compact package that would be easy for my staff to use (theoretically). My previous camera (Fuji S2 Pro) with a 100-mm lens was a beast. It takes two hands to use, and even then, it gets heavy.
The advantage of the 100-mm lens is that you don’t have to get as close to the patient to get tight intraoral shots. Sometimes, you’re almost touching the patient’s nose with the flash on the end of the 60-mm lens.
60-mm lens = lightweight and compact. But, you have to get closer.
100-mm lens = heavier and more cumbersome. But, you don’t have to get as close (more magnification).
Pingback: Putting Out Fires | The Dental Warrior® – A Blog for Dentists