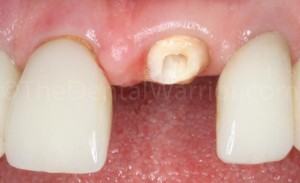
 Last week, just before the hurricane was predicted to strike, my office manager texted me on a Tuesday evening, “Broke my #9 off at the gum line!” Yeah… not a good look for a cosmetically-oriented dental practice front desk, eh?
As it turns out, Wednesday’s schedule had pretty much fallen apart. People were freaking out about the approaching Category 4 Hurricane, “Matthew.” Gas stations had lines for blocks. Supermarket shelves were being cleared by panicky citizens. The office phone was silent.  Dental care falls to the bottom of the priority list during a hurricane (unless they’re in pain… a lot of pain).
I didn’t have a lot of time to document everything. We all wanted to get home to prepare for the storm. So, this is a quick and dirty presentation. (I’ll add an image of the radiograph when I get back to the office.)
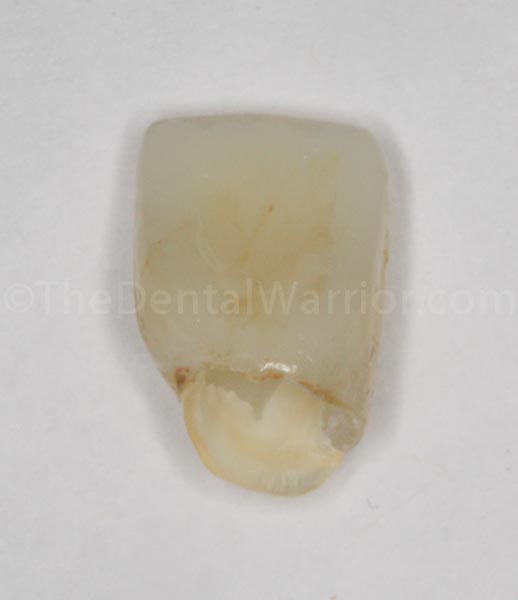
Old crown, partially cleaned up.
The long-term viability of the tooth is certainly in question. But, Hurricane Matthew was bearing down. Jo-Ann just wanted her front tooth back!
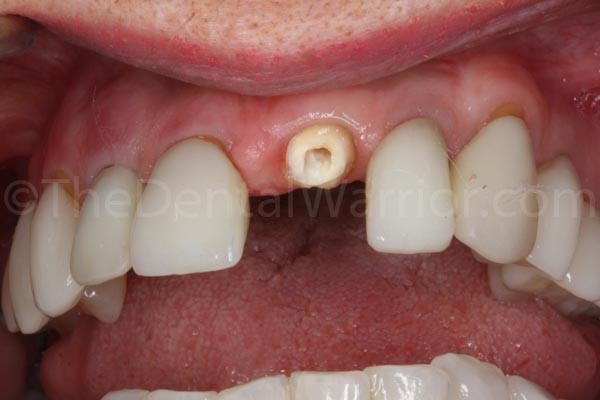
Not much there to for retention, eh?
The first thing I did was just see if the existing crown still “fit” on the remaining root structure. The margins seated fine all the way around.
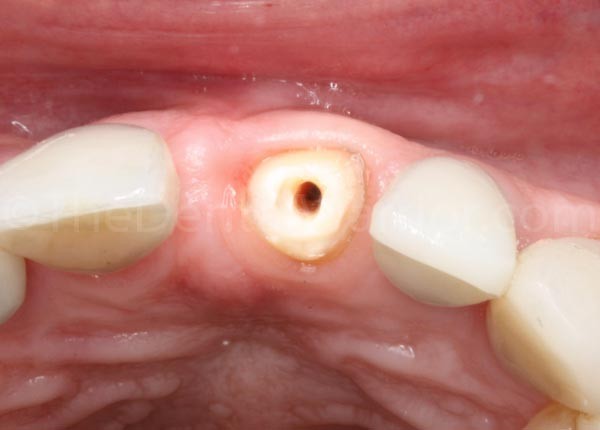
Root after post space preparation.
Fortunately (for our purposes / immediate goal), the tooth had already been endodontically treated. I placed an Optragate retractor for improved visibility and isolation. I prepped a post space and placed a fiber post (RelyX™ Fiber Post 3D).
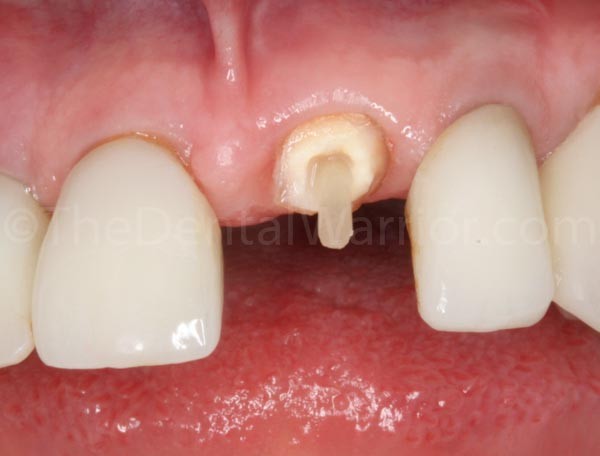
Fiber post cemented in place (with Rely-X Unicem).
The next thing I did was remove all the fractured tooth structure and build-up inside the old crown with a handpiece. I confirmed that it would seat passively on the remaining tooth structure and clear the new post. Then I sand-blasted the inside of the old crown. I applied Interface (silane / porcelain primer from Apex Dental Materials) to the intaglio of the crown, to be followed by 3M Scotch Bond Universal bonding agent (air-thinned but not cured).
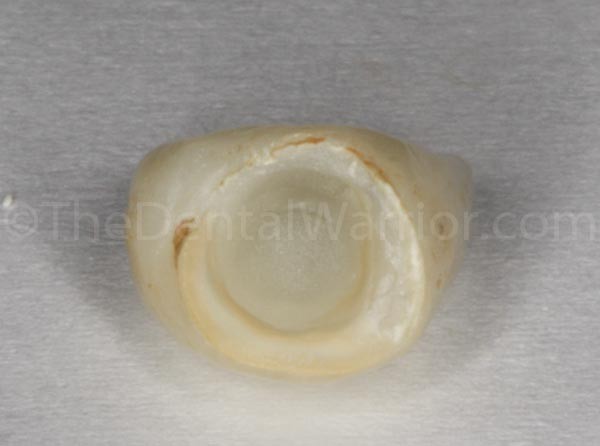
Old crown partially cleaned out with a handpiece and diamond. I finished removing residual cement / composite with a lab sandblaster.
Before I etched and bonded the remaining tooth structure and post, I packed some Ultradent retraction cord (Ultra-Pak) to eliminate any sulcular fluid contamination.
I filled the crown with 3M Filtek Bulk composite that had been warmed in hot water to make it temporarily more flowable. I filled the crown with the warmed composite and immediately transferred it to the tooth. The crown was firmly pressed into place as the excess composite extruded at the margins. I cleaned up the margins with a microbrush. Then I firmly pressed the crown down some more. Some more composite could be seen extruding from the margins. I cleaned it up again. Rinse and repeat until I saw no more composite extruding through my 3.5x surgical telescopes. I used some floss to make sure there was nothing left interproximally.
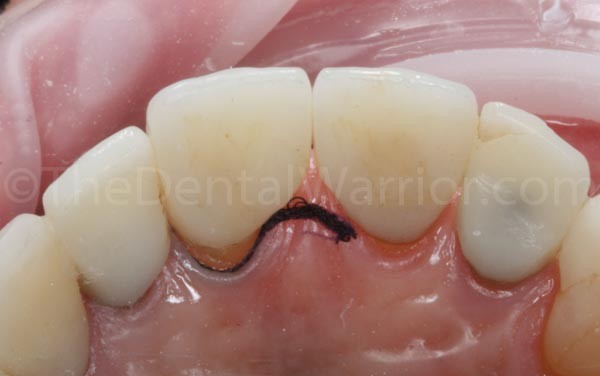
Crown re-bonded with retraction cord still in place. Picture is flipped horizontally, and I’m too lazy to fix it. 🙂
Once I was satisfied everything was in its place, I hit the crown on all sides with my Ultradent Valo curing light on the medium setting. I inspected the margins again to make sure they were clean and used floss to confirm the proximal margins were smooth. Then I cranked up my Valo “phaser” to the highest setting, “killer cure,” and cured again.
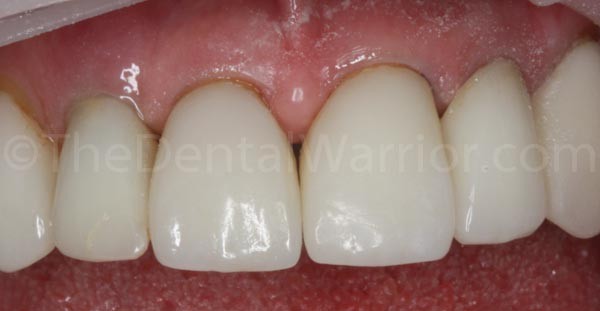
Post-op! It’s like nothing happened!
I adjusted the occlusion to take any unnecessary force vectors off of this rather precarious restoration. Jo-Ann said it felt great! And off we went to close the office and prepare our homes for Hurricane Matthew!
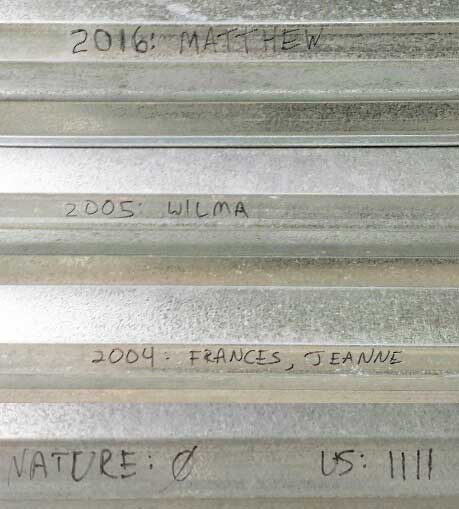
Shutters and “scoreboard.”
Fortunately, our area was relatively unscathed by Hurricane Matthew. Back to work on Monday!
 Copyright protected by Digiprove © 2016-2018 The Dental Warrior®
Hello dr,
I am thrilled by reading your post about the whole episode, and i really appreciate your quick response to your manager’s tooth problem.
Cheers!!!
There’s certainly a lot of artistry involved in restoring the teeth! When a tooth fractures or a crown falls off, it’s a good idea to get it replaced as soon as possible. It’s also important to make sure that the restoration doesn’t cause any discomfort in the mouth.
Wow that looked like a tough one to manage!