I’m Back in Black…
“I’ve been too long I’m glad to be back”…. back to the business of being a Dental Warrior! (Pardon the AC/DC reference.) I’ve been busy catching up on a variety of things after a week off for an emergency appendectomy and then another week of vacation in Maine. And, I’ve been covering the practice of the dentist next door (who was hit by a car while riding his bike). Busy… and tired. Somehow I also want to fit in blogging, writing, lecturing, and… oh yeah… my family!
Back in June, I was among six dentists invited to St. Paul, Minnesota to visit the 3M ESPE facility. We got to play with a lot of new products. Then they sent some samples to our practices for evaluation. This is one product that I have purchased since evaluating the sample. And, it will be a permanent addition to my Dental Warrior arsenal.
Most of us take crown and bridge impressions on nearly a daily basis. And, I think most of us would agree that it is the most critical step in the process.
First Impressions Count!
Booya!
Oftentimes, it’s the most frustrating part of indirect restorative dentistry. After we are done building up and prepping a tooth, the most anxious part begins. Now we pack cord (or use a laser) for retraction if margins are equi-gingival or subgingival. Mix up the impression material and go, go, GO!
Then we wait for the material to set. And, no matter how many years you’ve been in practice, you experience that moment of anxiety when you remove the impression from the mouth. Is it good? Or… not?
Tiny Bubbles…
One little tiny bubble or void can ruin the day. Or, what about those pesky folds or “pulls” that happen in exactly the WRONG places? Patients don’t like impressions much the first time. They like it even less the second or third time. Dentists spontaneously become diaphoretic when the first impression isn’t perfect. And, we know that impression material isn’t cheap. A single full-arch impression can include $25 – 40 worth of material. Multiple retakes can erode a profit margin quickly not to mention wearing your cheerful demeanor thin! And, when you’re doing an impression for multiple units, the stress goes up proportionately.
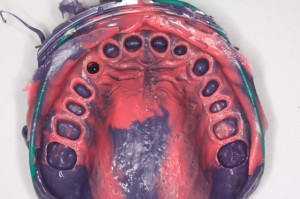
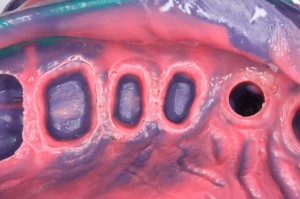 But, DAMN… doesn’t it feel good when you nail an impression? 360-degrees of captured-marginal-goodness is dental nirvana. And, anything I can find to make that a more predictable occurrence is a good thing.
Meticulous tooth preparation with magnification and illumination helps a lot. A diode laser for retraction is wonderful. Good cheek and lip retraction with the Optragate makes it easy, too. Getting the impression material to the preps efficiently and effectively is the final piece of the puzzle.
Typically, crown and bridge impressions are a two-phase technique using a wash material and a tray material. The wash is injected around the prepared tooth first, and then the tray is seated.
Previously there have been two ways to inject the wash material around the preps. You could use a traditional single-chambered intra-oral syringe into which you’d have to place the already-mixed wash material. So, you mix it, put it in the syringe, and use it immediately. And, you and your assistant do your best getting your timing right with loading the tray material. Both reusable and disposable versions of the single-chambered intra-oral syringe have been around for a long time.
Or, more recently, you could dispense it directly from the “grease gun” with a mixing tip and intra-oral tip attached to that. It’s a rather large contraption by the time you get it all together, and it’s not really conducive to precision placement in the patient’s mouth (with your controlling hand a good 10 inches back on the handle). It’s difficult to keep the tip consistently in contact with the marginal area all the way around. And, you know how that prevents those pesky bubbles.
No Worries, Mate!
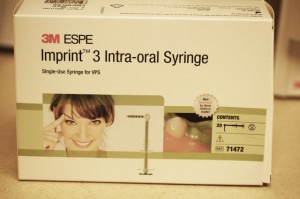
And, this is where the 3M Intra-oral Impression Syringe comes to the rescue. It combines the best of both worlds. The material isn’t mixed until immediately before being placed on the prep, because the 3M syringes are dual-chambered. And, it’s in a conveniently small and easily maneuvered device. Finally, it’s disposable. Use it and pitch it in the garbage. No disassembly or clean-up.
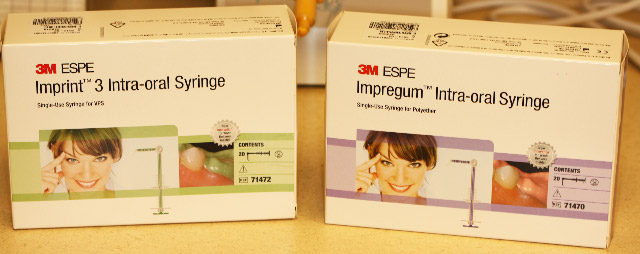 There are two versions of the 3M Intra-oral Impression Syringe. The purple one is for Impregum. The green one is for Imprint (or any other VPS cartridge system).
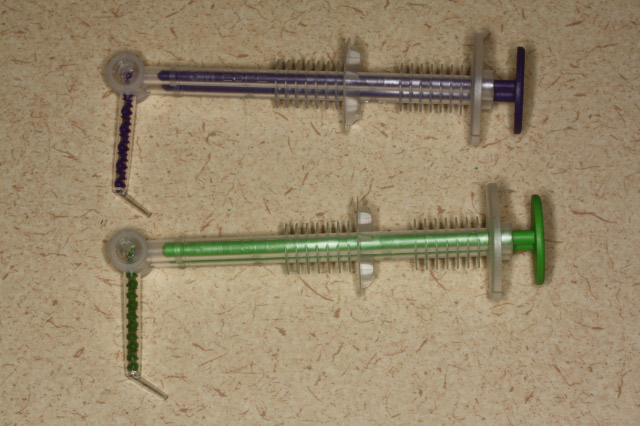
3M ESPE Intra-oral Impression Syringes. Green for VPS. Purple for Impregum.
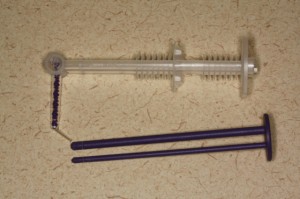
Plunger removed from syringe.
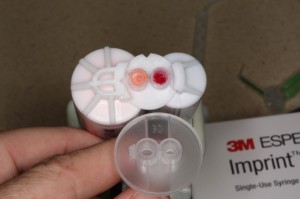
Back of syringe is designed to fit directly onto cartridge.
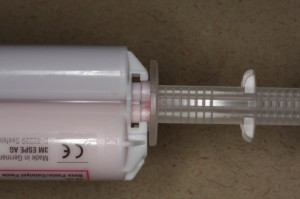
Syringe placed on cartridge – friction fit.
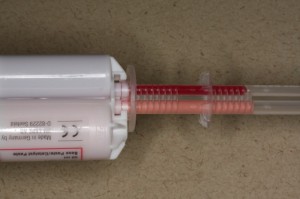
Loading from cartridge into dual-chambered syringe.
These syringes mount directly on the dual-chambered impression cartridge. You then pre-load them with the “grease gun.”
You’ll notice the mixing tips are bent at a 90-degree angle. That is the “closed” position. When the tip is in this position, it allows you to load the chambers while air vents out at the joint. When you are ready to use it, you rotate the tip out straight. Then as you squeeze the plunger, the materials mix in the tip and are expressed onto the prep. If you use 3M’s new glass ionomer restorative, Ketac Nano, you’ll recognize the tip. It’s the same thing. Those brainiacs at 3M creates some way-cool stuff!
There are a number of advantages to this system. First is much less waste of expensive materials. The mixing tips that come with the impression cartridges are long and leave a lot wasted material within them. With the 3M syringes, you can pre-dispense only what you need. And, the mixing tips are much smaller, leaving much less wasted material. 3M claims 67% less waste for VPS material and 84% less for Impregum. That’s significant!
In my video below, you’ll see how much to use for a single tooth vs. multiple preps.
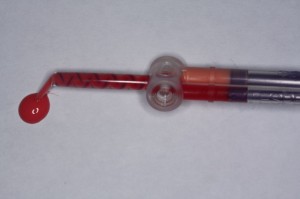
Plungers back in syringe and expressing wash material.
The 3M syringes are much easier to maneuver in the mouth. Keeping the small dispensing tip in contact with the prep all the way around, 360-degrees, is easy and prevents the incorporation of bubbles.
For a busy practice, you could pre-load a bunch of these syringes and have them ready to go. 3M claims you can load them up to 12 hours before use.
While this blog is primarily about the wash material side of impressions, I should briefly mention efficient tray material use. For your tray material, I highly, HIGHLY recommend getting the Pentamix machine from 3M. I call it the “soft-serve ice cream dispenser.” The impression materials come in foil “sausage packages.” There is far less waste than the traditional grease gun cartridges. And, you can be sure of a homogenous, void-free mix.
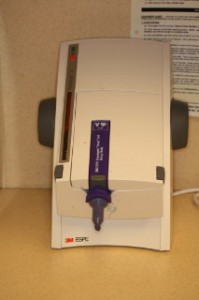
Pentamix automatic “soft serve” impression material dispenser.
There is one additional kicker. YOUR ATTENTION PLEASE. This is huge. The cost of tray material in the foil sausages, on a PER GRAM basis, is waaaaaaaaaay lower than the cartridges. I ran the numbers and came up with 1/3 the cost. That’s right… ONE THIRD. That’s a BIG savings, folks! I almost fell over when I learned that!
As you know, I’m a big fan of easy and inexpensive technologies that make my life easier or more efficient. Low investment, big ROI! 🙂 The 3M impression syringes come in a box of 20. The price at Henry Schein is $27.49 per box. That’s $1.37 each for you accountant-warrior-types. I expect they’re even cheaper when purchased in larger quantities. Ask your dental supplier about them and try a box! I bet you’ll like’em!
OK… here’s my impromptu video. Remember, I don’t rehearse or write a script. I just wing it! 🙂
 Copyright protected by Digiprove © 2013 The Dental Warrior®
Pingback: Crown prep and build-up tip! | The Dental Warrior
Pingback: Life-changing Dentistry | The Dental Warrior® – A Blog for Dentists
Pingback: Trim Your Own Dies??? | The Dental Warrior® – A Blog for Dentists