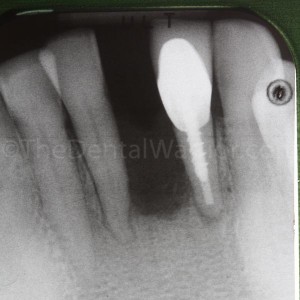
“Why did my tooth fall out?”
A non-regular (shows up for emergencies only) patient presented with a chief complaint that his lower front tooth fell out. He needed a replacement ASAP, as he didn’t want to go to work without his front tooth. He didn’t have the tooth with him. What can we do?
Obviously, before we treatment plan any long-term solution, we need to step back and perform a comprehensive examination. But, what can we do in the mean time to address his chief complaint?
Options for a quick and easy (and temporary) solution would include a “flipper” (temporary treatment partial). But, most patients HATE wearing them… understandably. Prepping and placing a provisional fixed bridge is premature at this point. The adjacent teeth have issues, and the patient didn’t anticipate losing them (today), too. I decided to create a composite “pontic” and bond it to the adjacent teeth as a quick fix. Paging Dr. MacGyver! So, here is a series of photos demonstrating what I did:
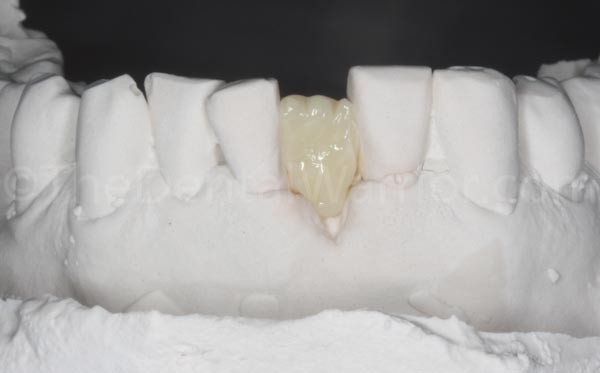
I decided to create the pontic on a model first. Doing it directly intraorally makes it impossible to contour and polish the tissue-side of the pontic. We took the impression in alginate and poured it up in quick-set mounting stone. Here you can see the initial dentin layer before adding the enamel. Patient would wait during this process.
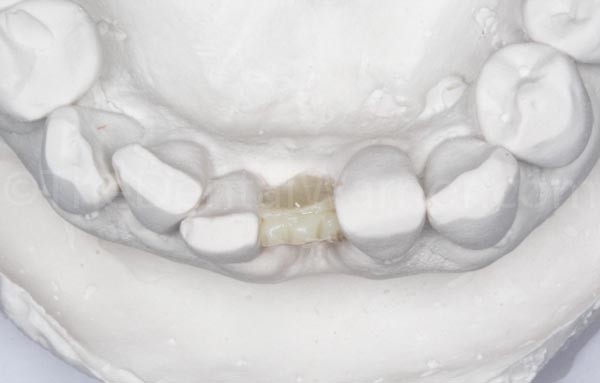
Incisal view of initial build up in opaque / dentin-shade composite.
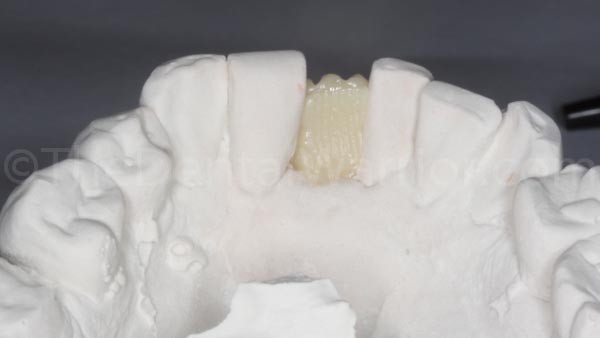
Lingual view of initial build up in opaque / dentin-shade composite. You can see my thumbprint! I then built the pontic to contour with an enamel shade composite.
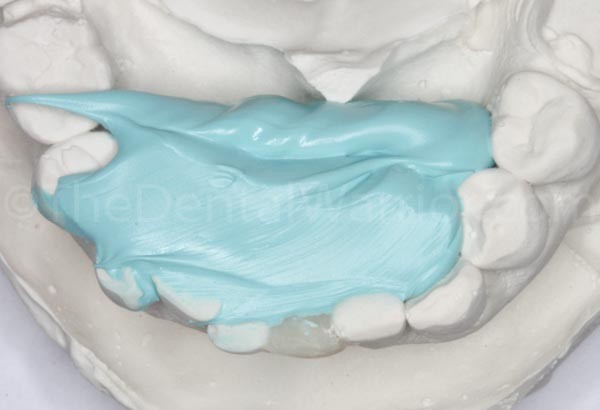
I then used Blu-Mousse to create a lingual index of the pontic on the model. I popped the pontic off the model, so I could shape and polish the tissue-side before bonding it intraorally.
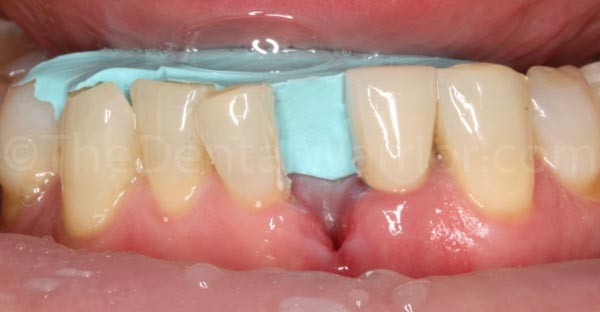
Tried the Blu-Mousse index intraorally.
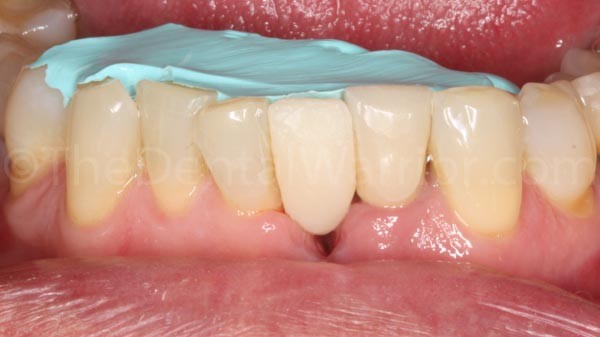
Tried in the pontic with the Blu-Mousse index.
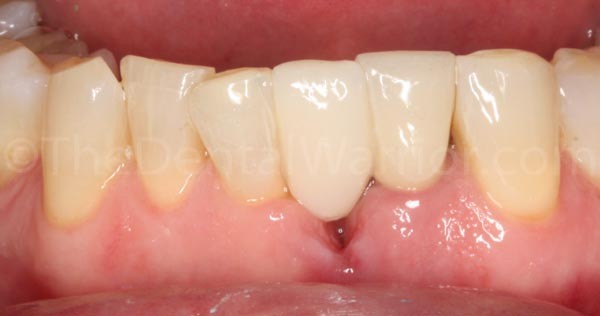
I sandblasted the proximal surfaces of the pontic and the adjacent teeth. I applied silane (Interface by Apex) to the crown #23. Then bonded with Scotchbond Universal and a flowable composite.
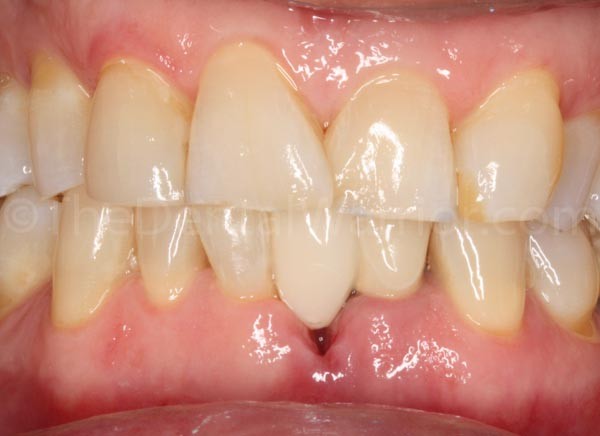
Adjusted occlusion so that it was clear in centric and excursions. Done! Patient thinks I’m a genius! But, he gave me a quizzical look when I told him he was grinding his teeth.
I was able to convince (I think) the patient to come back for a comprehensive examination and treatment planning.
 Copyright protected by Digiprove © 2015-2018 The Dental Warrior®
Nice Mike!
How long did this take and how much did you charge?
Thanks, Chris! A lot of his appointment was waiting… for me to do the lab work, while seeing other patients. Making the impression, pouring it up, and waiting for the stone to set was about 15 minutes. If I had to guess, building up the pontic in the lab took another 15 minutes. Bonding and adjusting in the mouth, maybe another 15 minutes. But, he was probably here at the office for an hour and a half. Just guessing. Fee was $578.
Mike,
Approx. how much would you have charged for a flipper? Approx. how long would you expect the pontic to last? And lastly, would you recommend a water pick for cleaning? I know you recommended follow-up for treatment planning…. but as you know, many people don’t return until something “goes wrong.” Thanks!
I don’t have my fee for a flipper handy. But, I think it would have been around the same or a little less. We discussed a flipper, and he did not want that.
How long do I expect this to last? No clue. I explain that it is “temporary.” No guarantees. That said… I’ve seen these last for years. Water Piks work nicely in these areas. But, we also show the patient how to floss it with a floss threader.
Nice job, Mike, I think it’s really smart to create the pontic extra-orally. How did you place the composite on the lingual? Did you just place flowable on the adjacent teeth or did you place Ribbond or any other splint like material?
Hi Jeanine,
Thanks for visiting my blog and posting a comment!
I didn’t use any kind of reinforcement (ribbond). I just etched, bonded, and used flowable.
Very nice! I once borrowed a circumferential wire (perio) splinting technique by Kanye and Zucker (Zucker was a teacher and is a mentor of mine). I prepped the teeth 360, and included a composite pontic in the middle (also circumferentially wrapped in wire). Who knows how long it will last? But the teeth will have to be prepped for a bridge anywhoo….(those teeth are more perio stable than your patient’s appear to be). It was definitely a MacGuyver move, or more like bubble gum and toothpicks, but so far it has been serving the patient until a bridge is a better option for him financially. Great idea making a stent first….ooooh how those have made life so much easier in situations like yours…..I learned that the hard way, more than once. Kudos again!
Thanks, Elle!
You have been offline a while now. Can’t wait for you to come back.
Hello Mike,
It pleasure to post your article with graphics.
This post may helpful for newbie dentist. Especially step by step management was excellent.
The initial dentin layer ** I nitial build up in opaque **Dentin-Shade composite ** blue mousse to create a lingual index ** Blu mousse index intraorally ** Adjusted occlusion
Happy Dentistry
Cheers!!