I got an emergency call from a long-standing patient a week ago on Saturday. We did a smile makeover with porcelain restorations for him 17 years ago, and he’s been a regular patient ever since. He told me that he bit into a candy that he expected to have a soft center. It didn’t. And, he heard a “crack,” then his front tooth was loose.
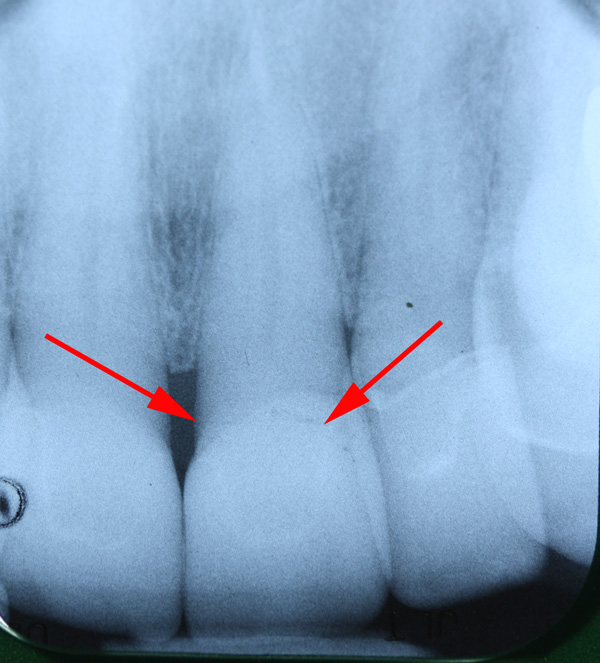
I met him at the office and determined he fractured the root. The crown of the tooth was still hanging on by some soft tissue. No pain, though. Since it was a Saturday, and I was working alone, I simply splinted it with some flowable composite to try to stabilize it until Monday.
We discussed his options:
- Endo, post, and crown.
- Extract and implant.
- Fixed bridge.
He decided he wanted a more predictable long-term result and chose the implant.
On Monday, we got a pre-op impression and sent him over to the periodontist for extraction and immediate implant placement. I used the pre-op model to make a Siltec putty matrix for a provisional.
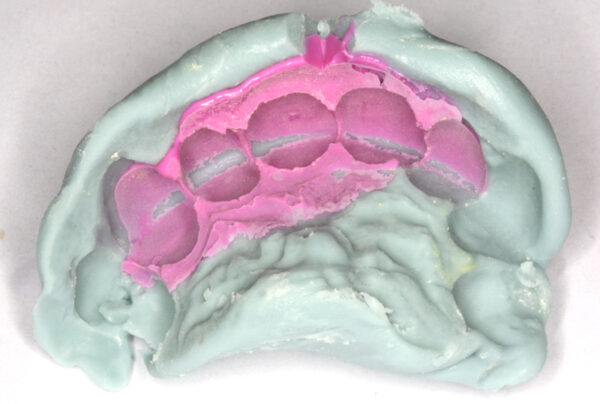
On Tuesday, he had the extraction and implant placed.
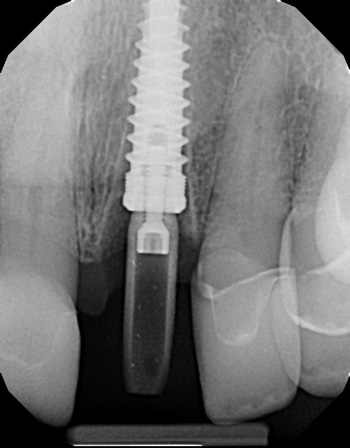
He drove over to my office immediately after that. The periodontist also placed a provisional abutment (PEEK material).
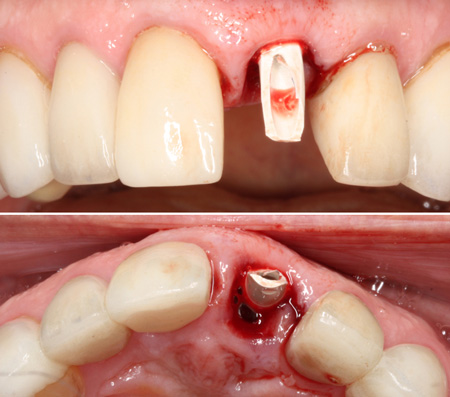
I shortened the provisional abutment a bit and roughened it with a diamond. I made sure I could seat the Siltec matrix without it hitting the abutment. I packed the screw access hole in the abutment with Teflon tape. Then I filled #9 in the Siltec matrix with Luxatemp and seated it for at least 3 minutes, allowing the material to lock on to the provisional.
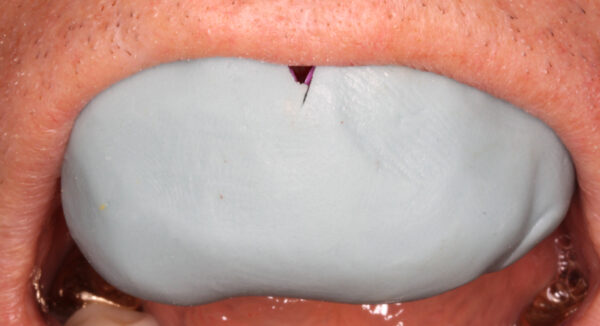
Pull the matrix off and this is left behind. Not too pretty…. YET!
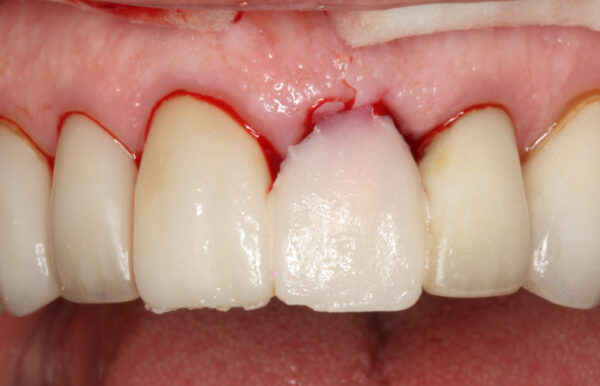
Next step is to cut an access to the screw through the provisional. Remove Teflon.
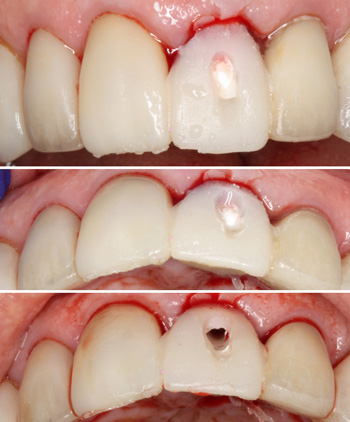
Unscrew and remove the provisional and abutment as one piece.
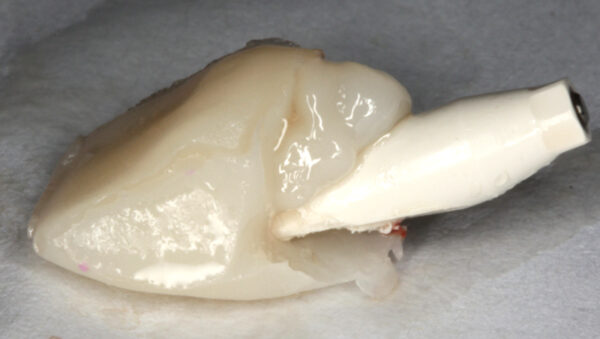 As you can see, the Luxatemp did not make it all the way down to the base of the abutment, leaving some voids. Flowable composite to the rescue!
Outside the mouth, I filled in the blanks with flowable composite, shaped and polished for a smooth emergence profile, ideal for soft tissue healing and supporting the papillae.
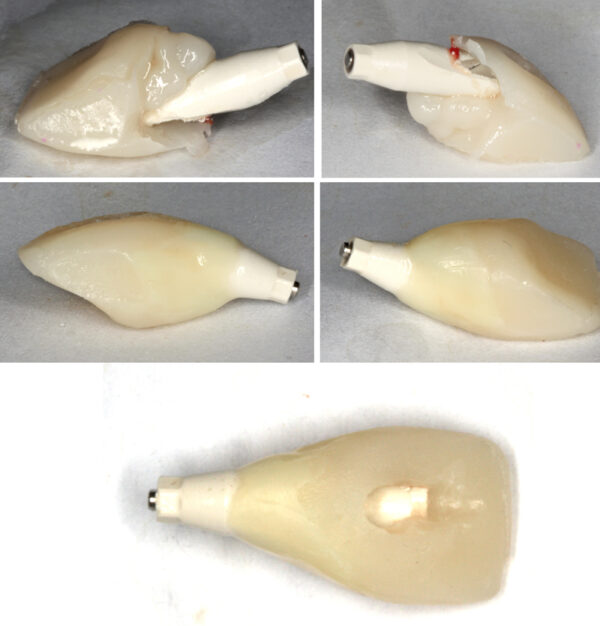
Screw it back in the mouth and make sure the soft tissues are being supported. Add composite (outside the mouth) as needed.
Plug the screw access in the abutment with Teflon again, and seal over with composite. Polish, stain, and glaze as needed to match the other teeth. Make sure the provisional is completely out of occlusion in both centric AND excursions (lateral and protrusive). That’s why the provisional is a bit shorter than the other central.
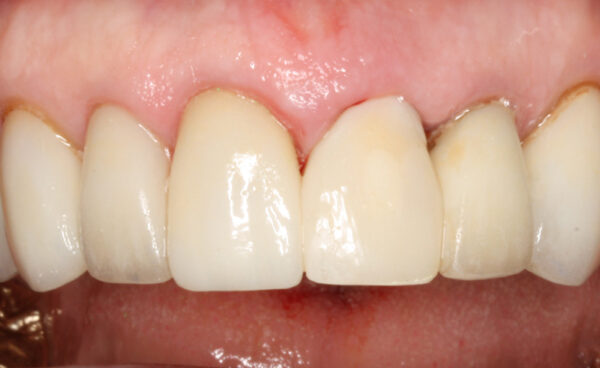
Now wait for healing and integration. Restore when ready!
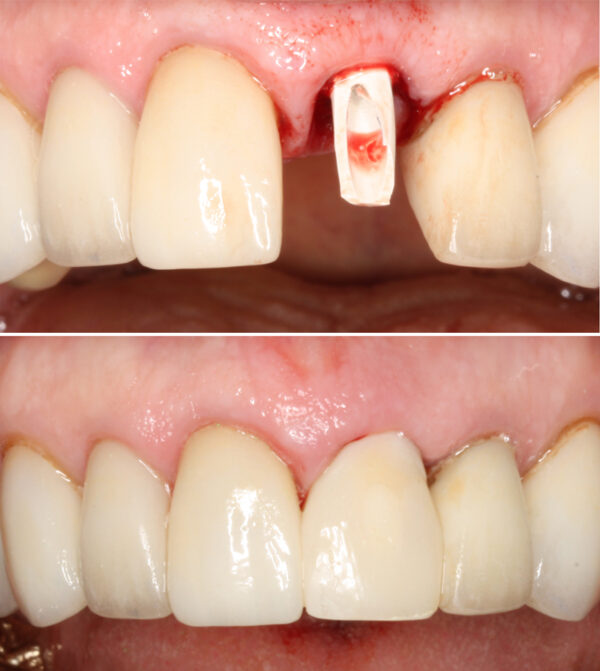
Consider how daunting a proposition it is to tell a patient, “We’re going to take out your FRONT tooth and make a temporary.” That’s some scary shit. A back tooth? No problem. My VERY FRONT tooth?!? No bueno!
But, if you can confidently create provisionals with this level of esthetics… You are a dental god! It looks like it grew there! It’s a huge builder of confidence in your patients. Of course, you need to factor your time (and expertise) into the fee. I charge a separate fee for the provisional.
I’ve written about similar cases before here.
Comment below!
Edit to add: Click here to see how I did the impression with a customized impression coping to register the soft tissues.

Nice result on the temp.
I’ve noticed on a couple of your anterior implant cases that the poor positioning/angulation of the implant by your surgeon eliminated your ability to use screw retention of the crown restoration. You are a very high quality dentist. I would encourage you to demand that your surgeon not just plug a hole with an implant but would slow down and give you the best chance of avoiding the negatives of cemented implant crown restorations by improving the implant’s positioning. Otherwise, find a surgeon that can do this for you. Perhaps providing a stent with a drill access lingual to the incisal edge will keep the surgeon on course is a good place to start. Don’t accept “the implant goes where there is bone and that the best I can do” as an excuse. Elimination of these compromises are routinely done by skilled and conscientious surgeons.
Thanks for your wisdom and patriotism. I love reading your blogs.
Ha. Yeah… the surgeon I’m using is top-notch. I like to say his implants look like they grew there.
With due respect… You’re making a LOT of assumptions. Yowza. And, to suggest that my surgeon ISN’T “skilled and conscientious????” REALLY? You’re going THERE? LOL! What does that say about ME? LOL!
In my experience… Due to the angulation of the maxilla and the anatomy of anterior teeth, it’s RARE that we can use screw-retained implant restorations in the anterior.
I believe it’s Nobel that makes a screw that can be used with an angulated channel and wrench for this reason. Though, I have not tried it. It’s really a solution to a “problem” I don’t have.
While I like screw-retained restorations (easier), I’m perfectly comfortable placing cemented crowns on custom implant abutments. No issues at all with that. I don’t consider it a “compromise.” I don’t understand the aversion to a cemented crown in such cases.
What are the “negatives?” Please don’t tell me about excess cement. That’s a DENTIST problem, not an implant restoration problem.
I certainly wouldn’t want the surgeon to compromise the placement of the implant JUST so I can do a screw-retained crown.
Or are you suggesting that “all anterior implant crown restorations can be screw retained?”
BTW… how do labs attach the porcelain crown to the titanium substructure with screw-retained crowns?
With cement, of course. 🙂