It’s funny how things come in cycles / clusters. Immediate implant provisionals seem to be my “thing,” lately.

I enjoy the challenge, and each case is a bit different. So, it seems I’m inventing new techniques as I go with each case.
Today’s case is a new patient. She moved down, mid-treatment, from “up north.” Her periodontist up north had placed an implant in site #9. Apparently, #10 had been grafted to prepare for a future implant. In the mean time, she has been wearing an Essix retainer as a temporary.
Her periodontist up north referred her to a periodontist here, who happened to be “my periodontist.” And, then my perio referred her to me. The plan was for my perio, Dr. Gornstein, to uncover implant #9 and place implant #10. Then I would place immediate provisional crowns on both.
I started with an exam and study models. I sent the study model for a wax-up of #’s 9 and 10.
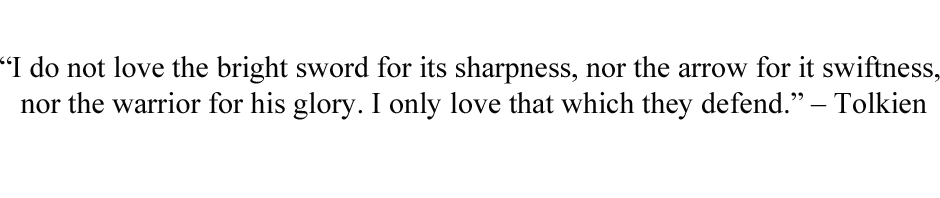
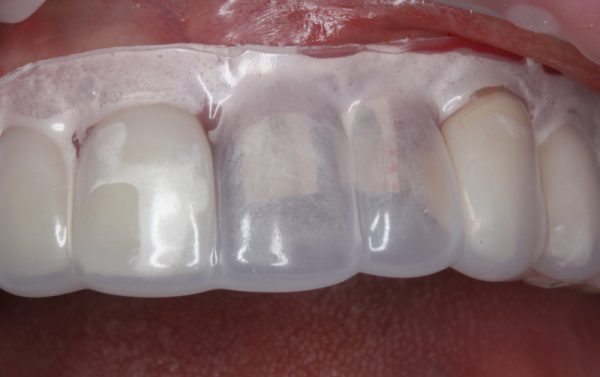
Patient presentation pre-operatively. She also requested replacement of crown #11.
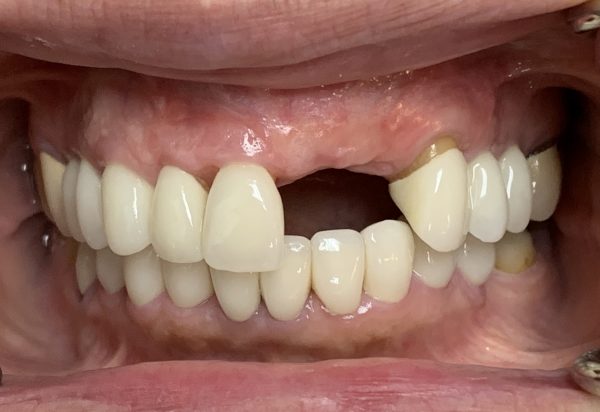
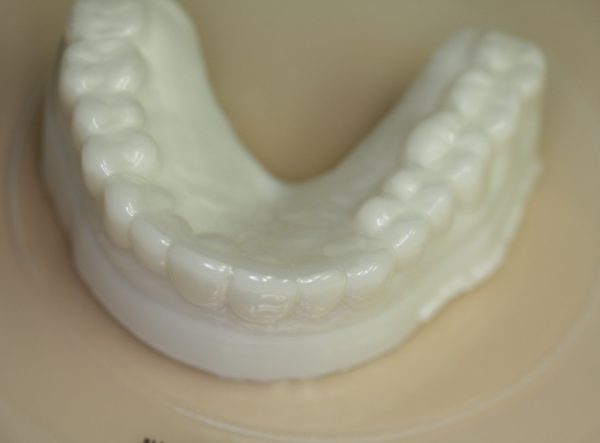
Instead of getting a wax-up back, I got what appears to be a printed model and a putty matrix (I didn’t request the matrix – usually make’em myself, but OK).
Not bad… but, #9 and 10 are longish. I can correct intra-orally.
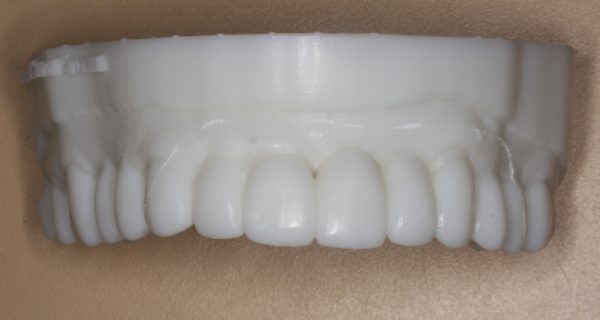
Putty matrix from lab.
The appointments were set, and the patient would come directly to my office from the perio.
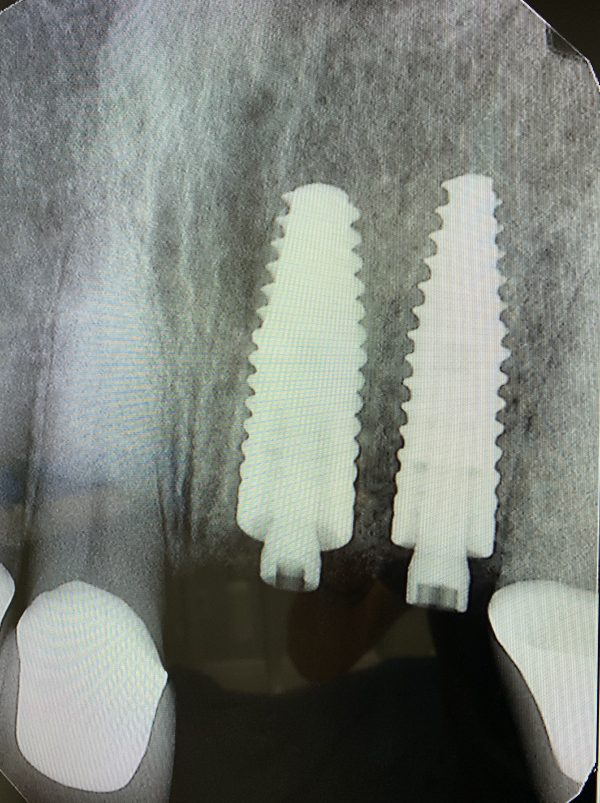
Implant #10 added by my local periodontist.
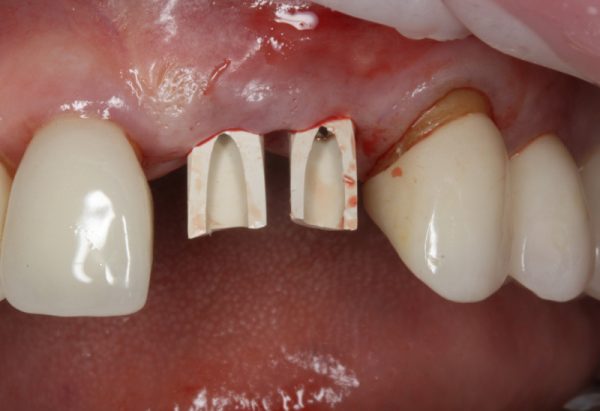
This is how the patient presented at my office immediately post-surgery. The periodontist provided the “PEEK” temporary abutments.
Occlusal view immediately post-surgery.
As I initially examined the surgical result, I didn’t think I’d need to reduce the temp (PEEK) abutments, but I wasn’t sure. The putty matrix is opaque, so with that, I could only “feel” if there was any interference. But, I wouldn’t be able to see if there was adequate clearance to avoid “show-through” of the abutments in the provisionals.
Then it occurred to me that I could make a quick transparent stent on the lab’s printed model! Hooray! I took the model to my office lab and used my MiniStar pressure former. I decided to use the “Copyplast” material. It’s not completely transparent, but transparent enough. But, it’s flexible, and I would be able to get it off the model and trim it quickly.
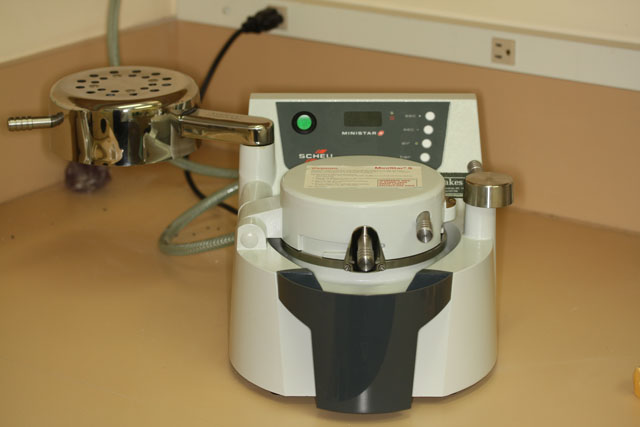
Great Lakes Orthodontics “MiniSTAR” pressure-former. This gizmo rocks! Way, WAY better than a vacuum “suck-down.”
Copyplast pressure-formed on to the model. Sorry for the shallow depth-of-field. I forgot to change the aperture setting on the camera.
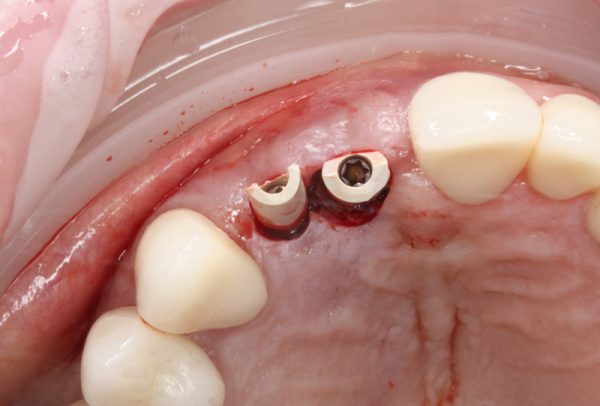
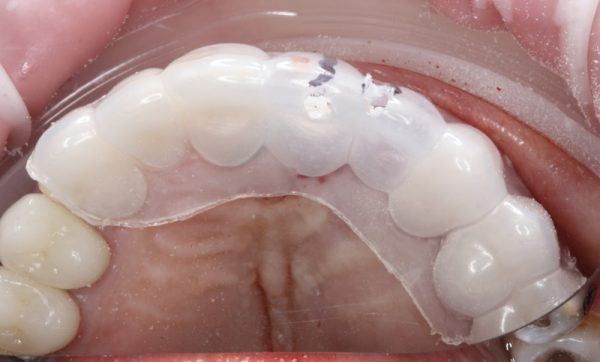
Clear (sort of) Copyplast matrix placed intra-orally. I could see that I had plenty of clearance.
Then it occurred to me that I could use this matrix to mark where the screw-access openings were oriented.

Marking abutment screw access on matrix.
Then I drilled a “pilot hole” over each abutment in the matrix, aiming at the screw.
Copyplast matrix with “pilot holes” to help guide my initial drilling to uncover the screws through the provisionals.
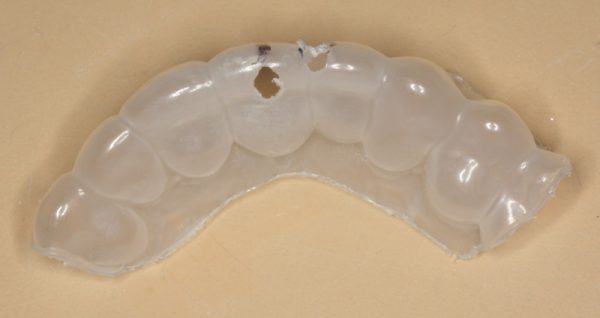
Pilot holes drilled in the Copyplast matrix.
OK… it’s time to git’er done! I loaded the putty matrix with Luxatemp and seated it over the abutments. Before I did that, I blocked out the proximal undercuts with OpalDam (Ultradent). I also filled the screw access holes with Teflon tape.
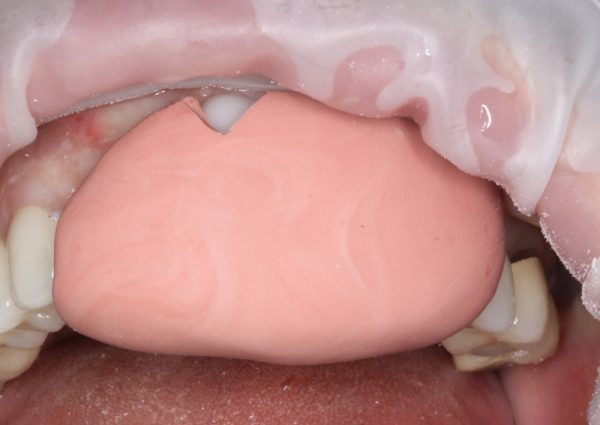
Putty matrix loaded with Luxatemp and seated. I let it set for 3 full minutes.
Putty matrix removed after 3 minutes. Luxatemp is locked on to the abutments.
OK, now I’ve got to find those screws!
I put the Copyplast matrix back on and initiated the prep to uncover the screws.
Copyplast with pilot holes on the freshly-locked-on provisionals.
The access to the screw on #10 ended up more facial than I’d like, but that’s not unusual for upper anterior implants. Not a problem, as you’ll see.
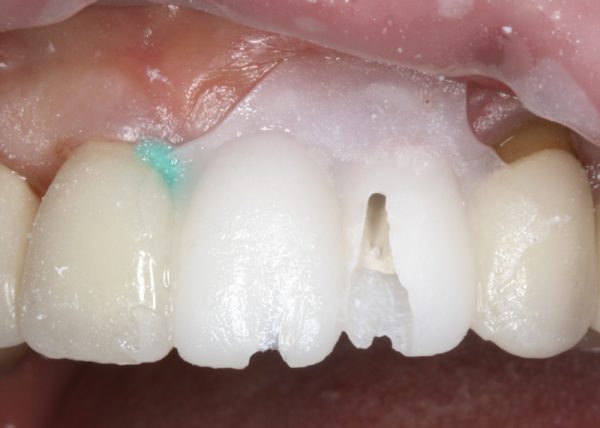
Screws located! Facial view. The green stuff is the OpalDam I used to block out the proximal undercuts of the adjacent teeth.
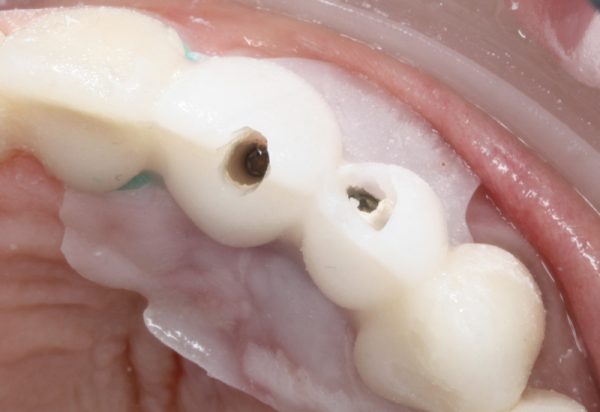
Occlusal view of screw access holes through provisionals.
I unscrewed the abutment screws and teased the provisionals out. Then I trimmed the excess and filled in the gaps to create an emergence profile.
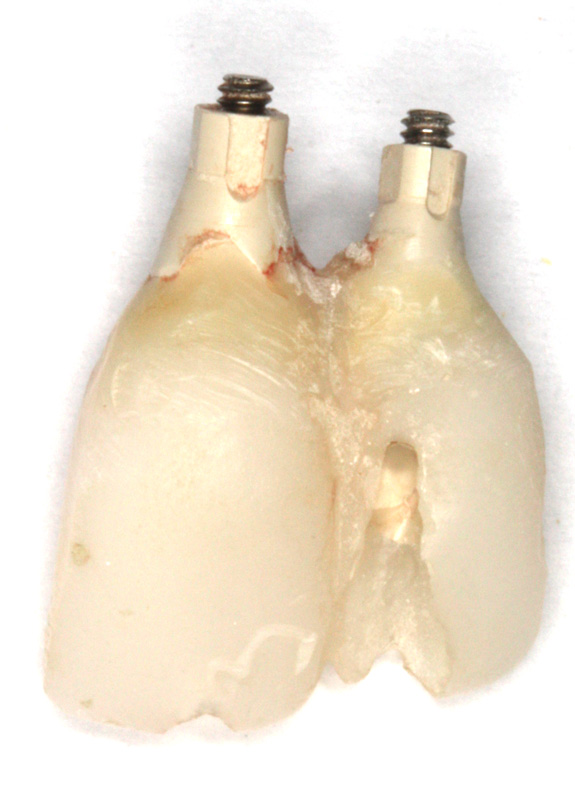
Provisionals roughly trimmed.
I filled the screw access holes with Teflon tape and then sealed the openings with Filtek Supreme composite. I used Ivoclar’s Tetric Color composite stain to get the shade dialed in a bit. I used medium brown and some violet. Then I mixed a bit of violet with Luxaglaze light-cured glaze to dial down the value.
Provisionals back in the mouth. I ended up trimming the incisal edges a fair bit to get them “right.”
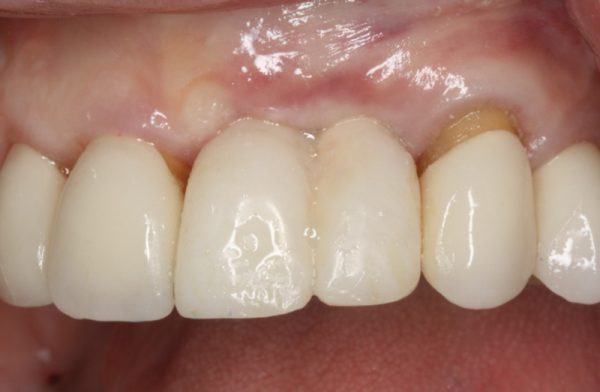
Close-up of provisionals. I need to go back and trim the gingival embrasure between 9 and 10. By this point, the patient was pretty pooped!
The patient was very happy with the result. All occlusal contacts (centric and excursive) were removed. I also like to remove the proximal contacts – just barely enough to see “daylight” between them. My theory is that the adjacent teeth can move slightly under function, and I don’t want that movement transferred to the implants through the proximal contact.
Next, I’ll go back and see what I can do to try to develop a papilla between 9 and 10.
Edit to add 3/11/20:
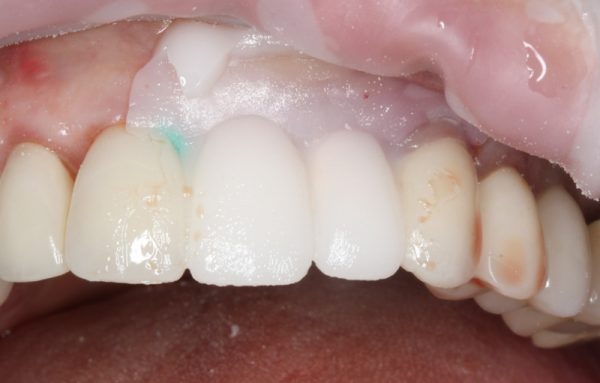
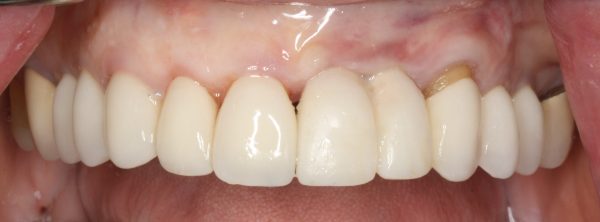
I delivered this case today. During the healing phase, I prepped and temped natural tooth #11. Then final impression of all three (9, 10, 11). Final photo is immediately after delivery.
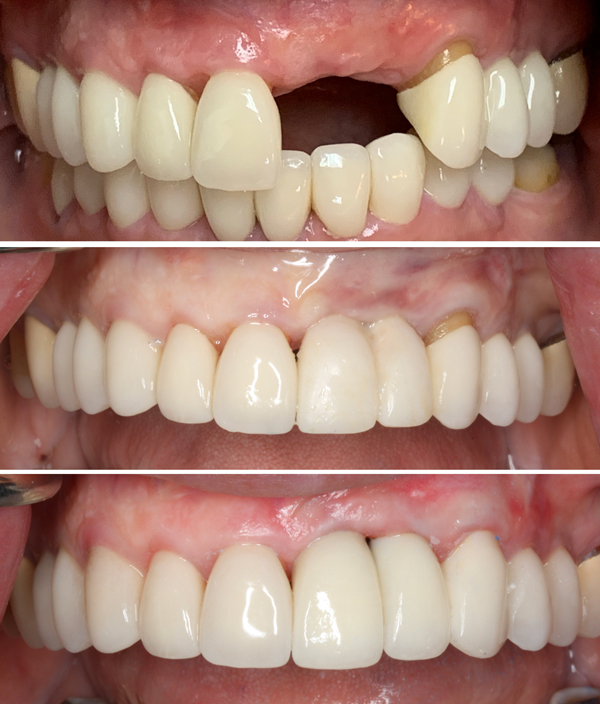
Before, temps (before I prepped #11), and finals. We’ll see what happens with the papilla. This was immediately post-delivery. I’m not super-optimistic about the papilla, but we’ll see!
I was quite pleased with the shade match (on the first try!).
 Copyright protected by Digiprove © 2019-2020 The Dental Warrior®
Very nice documentation doctor. Respectfully, however, I believe this was a poorly treatment planned case by you, your periodontist, or both. Seldom is there ample M-D space in the esthetic zone for adjacent implants (save for 8-9) if you want papilla and this case is a prime example. I am glad that your patient is happy with the results because it will not get any better than this. You will never get papilla in between 9-10, at least not to the extent of the rest of the mouth. In fact, I would be concerned about inter-implant bone loss at the crestal 1/3 of 9-10, which could result in a large soft tissue defect. Then again, you may get lucky. Your pre-op picture is beautiful. A much more esthetic (and evidence-supported) result would have been to create an ovate pontic in the #10 area and to do a cantilevered restoration off of #9.
I do not mean do sound harsh or condescending. You are obviously a skilled and caring clinician, I am just giving my thoughts.
Thanks for commenting (even though anonymous! 🙂 ). I agree with your concerns. The implants were treatment planned by the patient’s periodontist up north… before I got involved. In other words, I didn’t treatment plan it. It’s one of the vicissitudes of being a dentist in Florida (with snowbirds from up north). We often get involved after the fact (tx planning).
I agree that the chance of a papilla here is a long shot. Maybe even impossible. I’ll do the best I can, given the circumstances, of course. I will admit that I am biased against cantilevers, though. I’m just not comfortable with them, unless it’s the ONLY choice. But, I get what you’re saying here. I will update this article as the case progresses.
Good job doctor. I was wondering is there a possibility to use Removable Partial Denture instead?
She had been wearing an Essix retainer and understandably hated it. I don’t think she would have liked a partial / “flipper,” either. She was VERY happy with this. Thanks for commenting!
Nicely done! Sometimes the problem is the patient sees a well-done temporary. And figures….. I’m good with this…. and is never to be seen again. I’ve had it happen.
I’ve heard of that happening, but in 31 years, I’ve not had one patient do that.
I had one not return, but I think he passed away. Cool case where I used the actual extracted tooth (coronal section) as a provisional over the temporary abutment. Check it out:
https://thedentalwarrior.com/2011/11/09/implant-provisional-using-the-original-tooth/