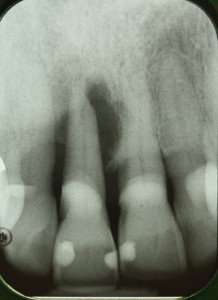
 Several months ago (April 2011), a long-time patient had tooth #8 blow up. The patient is a 80 y.o. male. It was a perio-endo lesion (with root resorption evident), and we decided extraction and replacement with an implant would be the most predictable result.
I sent the patient over to the periodontist for the extraction. He placed graft material but did not place the implant. He sent the patient back to me with tooth in hand. I sectioned the root, back-filled the pulp chamber with composite, and rounded it off to be tissue-friendly. I then bonded the tooth to the adjacent teeth creating a temporary bonded bridge. Nothing special there. Been there. Done that. Many of us have, I’m sure. To see what I did next, keep reading.
Anyone can make 10 pretty teeth. Try making one ugly tooth!
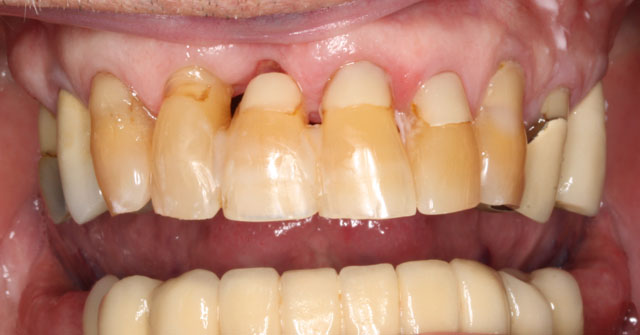
Tooth #8 bonded in place as a temporary replacement after the extraction. This is 6 months later. Some soft tissue remodeling is evident. But, it held up nicely for six months!
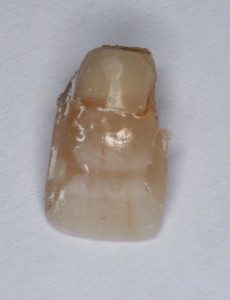
Natural crown of tooth #8.
Today, it was time for the implant to be placed. The periodontist would also be placing a temporary abutment. The patient came to my office first thing in the morning for me to remove the bonded tooth, so the periodontist could place the implant. Prior to removing the tooth, I made an alginate impression to possibly use in fabrication of a provisional.
Little wheels keep on turnin’!
After the patient left, I had some free time, and the little gears in my head started turning. I saw that tooth sitting on the table and wondered, “Could I hollow that out and use it as a provisional??” So, I got the handpiece out and started carving out the center of the tooth. Imagine a crown prep inside-out. I wasn’t sure if the tooth would survive the effort. It did. Hmmm… This could be interesting (and fun)!
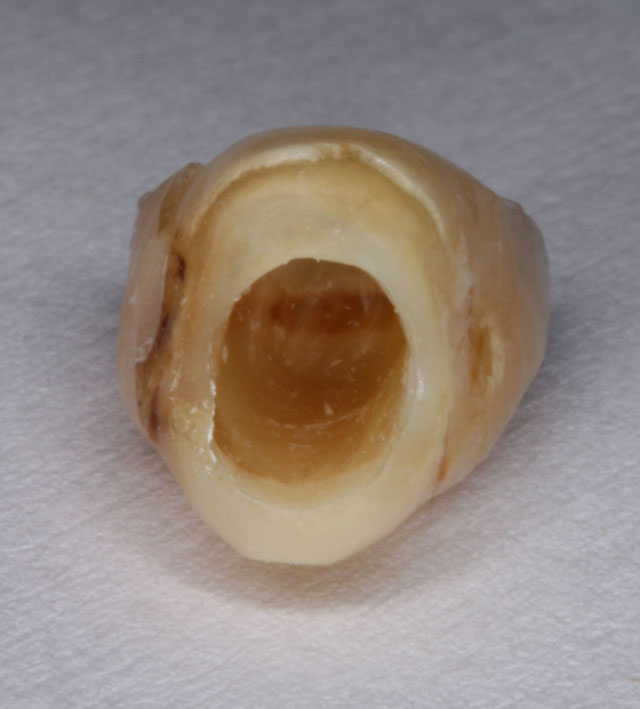
Initial effort at hollowing out the tooth.
Just before lunch, the patient returned to my office:
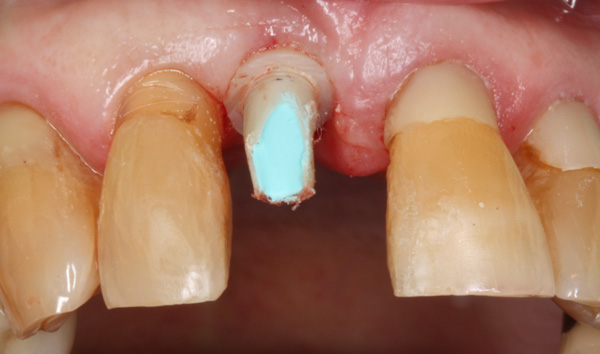
Temporary implant abutment was placed by periodontist at time of surgery. I used Blu Mousse to fill the screw access.
Preppin’… Preppin’ on an extracted tooth…
I prepped the the temp abutment a bit more to create more of a taper, and I filled the screw access with Blu Mousse bite registration material. I tried on the hollowed out tooth, but it wasn’t seating all the way. So, I prepped a bit more, and I hollowed out the tooth a bit more.
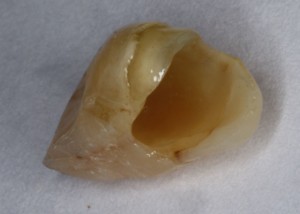
I expanded the hollowing out of the tooth to make it easier to seat on the temporary abutment.
I finally got it to seat passively over the temporary abutment. Next, I applied a self-etching bonding agent (3M Adper Easy Bond) to the inside of the tooth and light-cured. Then I filled it up with Luxatemp (DMG America) and pushed it on the abutment. You may have noticed the patient has lost a fair amount of periodontal tissue, so there were “black triangles” that could potentially cause the Luxatemp to lock in. So, I removed the provisional at about the 1-minute mark, while it was still rubbery. Then I let it bench cure for a few minutes. I used a flame-shaped diamond to contour the gingival aspects of the provisional. I reseated it on the abutment and then filled in any marginal voids with flowable composite. Here’s the provisional after relining it with Luxatemp:
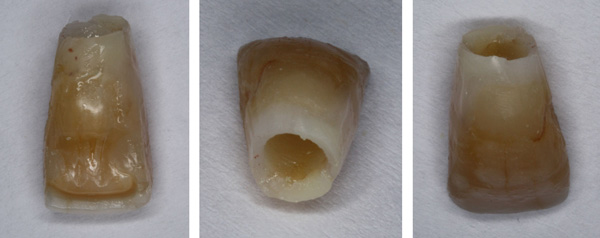
Tooth relined with Luxatemp. COOL!
Now THAT’S a custom provisional!
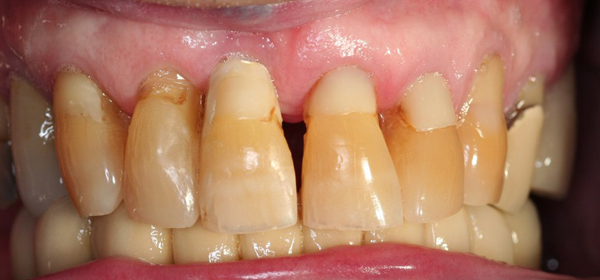
I cemented the provisional with a thin film of Tempbond NE, as retention was very good. It is intentionally out of occlusion. And, certainly, it’s not “perfect.” But, it sure looks better than a monochromatic bis-acryl provisional would have looked. Yes, I could custom stain a bis-acryl provisional, and I’ve done that many times. This process probably took the same amount of time as it would have to make and custom-stain a traditional provisional crown. And, it was something I had never tried. I like to have fun at work. And, improvising techniques is part of the fun for me. 🙂 Here’s the result. Patient was very happy!
A tooth only a mother could love!
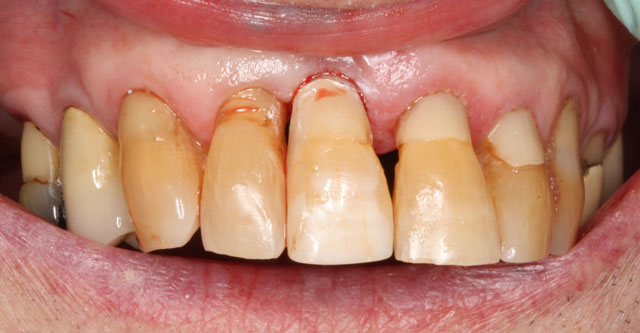
Not perfect. A bit dehydrated. But, matching those other teeth on this 80 y.o. patient with a traditional provisional would have been tough.
That was today’s fun! In a few months, my challenge will be to make a ceramic crown that looks as ugly… I mean…. natural!
PS… One week follow-up:
 Copyright protected by Digiprove © 2013 The Dental Warrior®
I like when I get on FB and see a new BLOG article from Dr. Mike. I love your attitude and spirit towards dentistry. Keep up the good work.
Thanks, Michael!