Shit Happens
Last September a new patient came to my office via my website. She was dancing and shit happened. She broke half of tooth #8 off. I had recently bought Ultradent’s “big crayon” Vit-L-Essence composite kit but had not really tried it out. I figured this was as good a time as any. Let’s take it for a spin and see how this stuff handles! Some of you have seen this composite case before, as I published it on a number of dental forums.
But, this story goes beyond this particular restoration… read on.
First I’ll show you how we restored this tooth with a direct composite, step-by-step. I was particularly proud of the result! 🙂
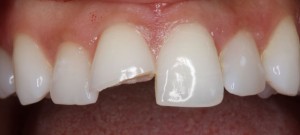
Fractured #8. No pulp exposure.
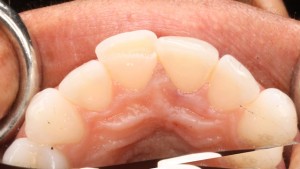
Occlusal view of fractured #8.
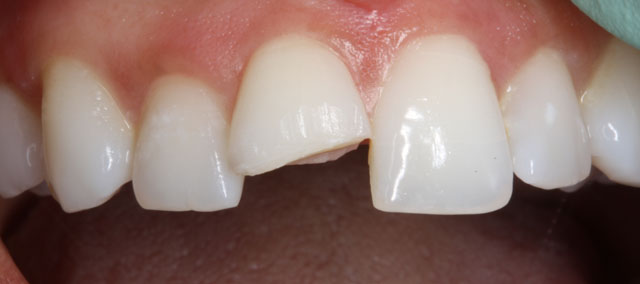
Place a “wavy” bevel on facial.
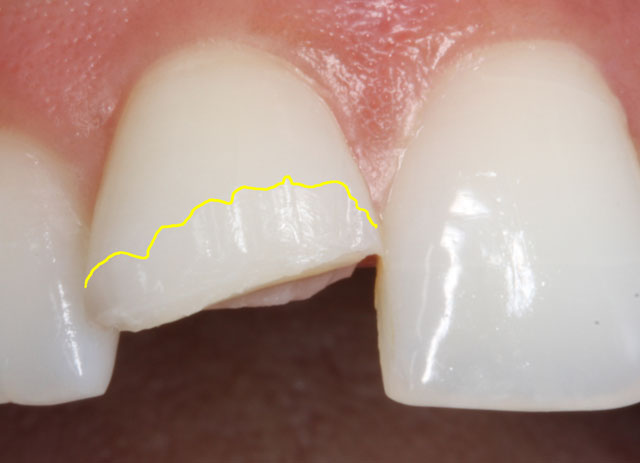
Outlined edge of bevel in yellow to demonstrate “wavy” bevel… aka “dazzle camouflage.”
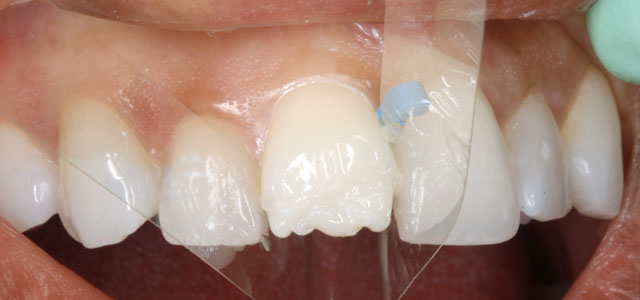
Build up dentin layer with opaque composite and create developmental lobes.
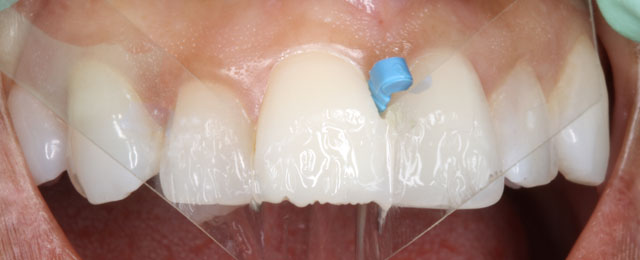
Enamel layer build up with an enamel shade composite.
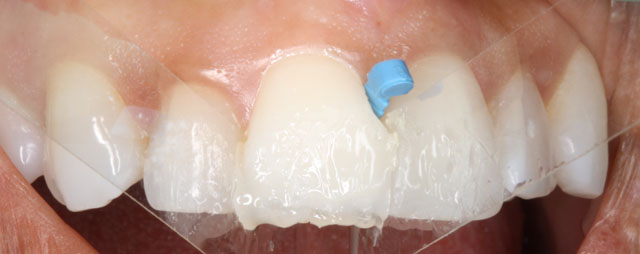
Translucent composite for incisal edge.
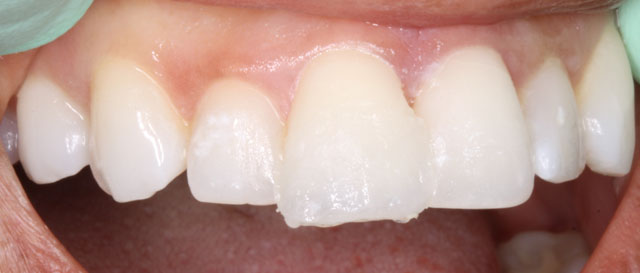
Then I used an “irridescent blue” shade of composite over the incisal. I have a tendency to overbuild the tooth, as I did in this case. Time to cut back!
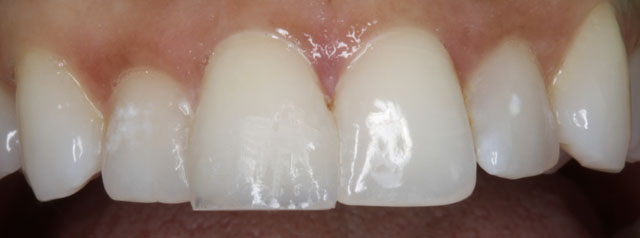
Cutting back, giving the tooth some shape. More to go.
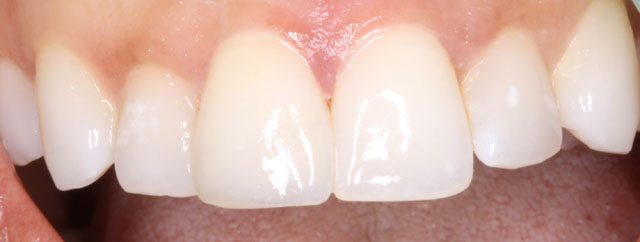
Now it’s looking like a proper tooth!
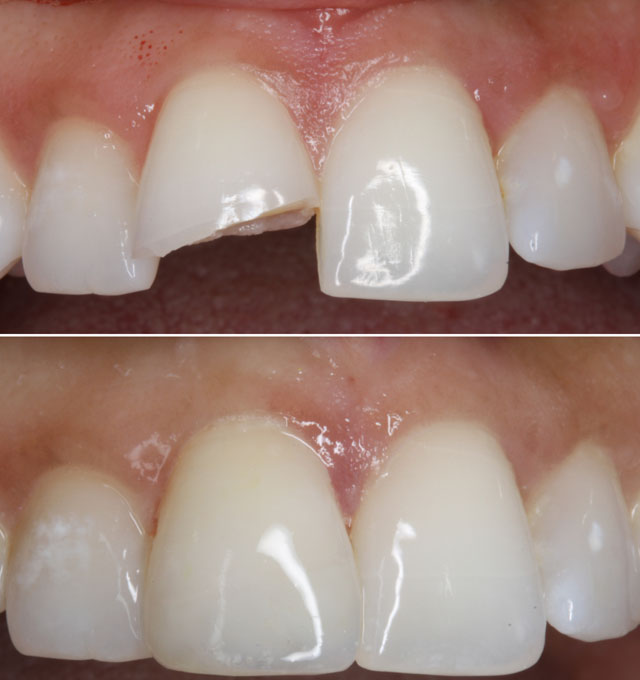
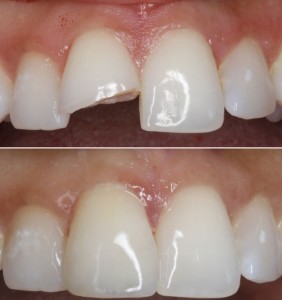
Before & after.
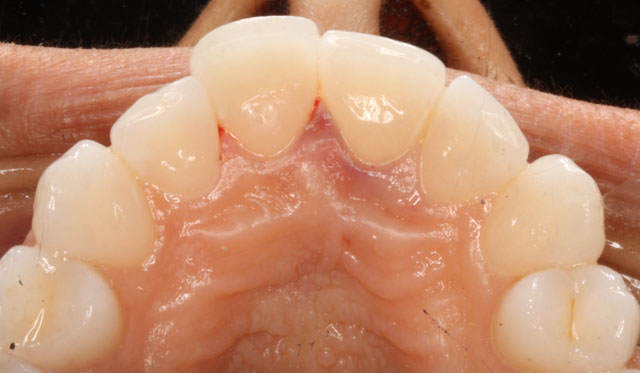
The tooth is not overbuilt facially. That’s the position of #8. Look at the palatal gingiva and see the occlusal view of the fractured tooth at the top of the page.
My new emergency patient was thrilled with the result and became a regular patient. She also decided that she wanted straight teeth. Six Month Smiles short term orthodontics was the perfect solution. And, so we went forward with that.
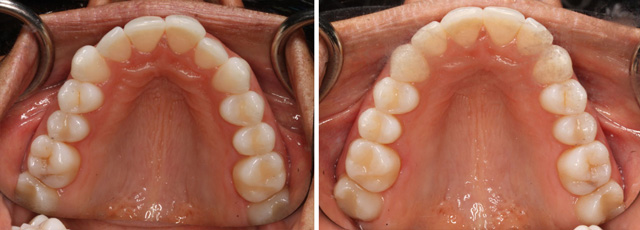
Upper arch – before & after Six Month Smiles.

Lower arch – before & after Six Month Smiles.
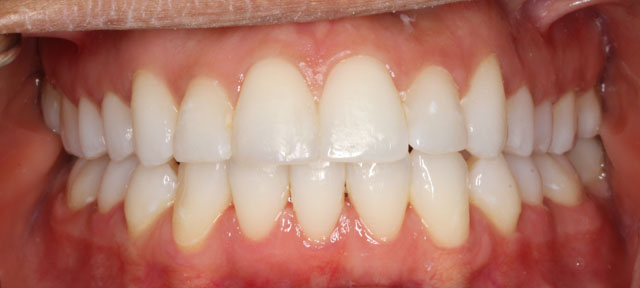
After Six Month Smiles
When my patient was happy with the results, we debracketed and placed fixed bonded retainers. That was last month – April.
Shit Happens Again!
Then, a week and a half ago, she calls my office on Monday morning. Over the weekend, she had another accident. She fell down on a table at a pool party, and shit happened… again:
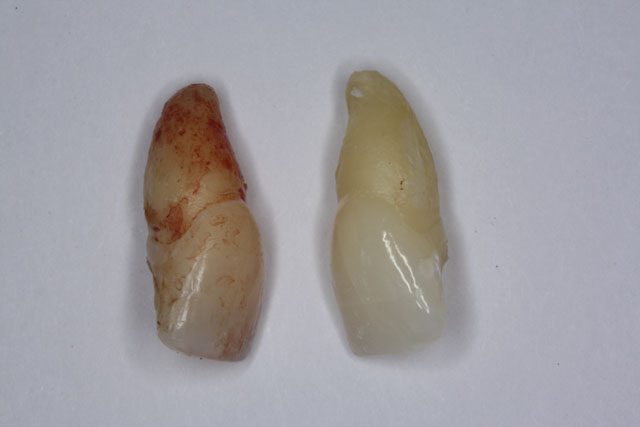
Damn! Shit happened AGAIN! But, my big composite survived! 🙂
Ugh!! Hate to see this! Patient was devastated. She was very swollen and sore. She also had a broken nose and a broken finger. I couldn’t even lift her lip to take a look. Just no way to do anything. So, I prescribed a Decadron dose-pak to help with the swelling and rescheduled her for the following week.
When she came back she looked and felt a lot better. The Decadron worked very well.
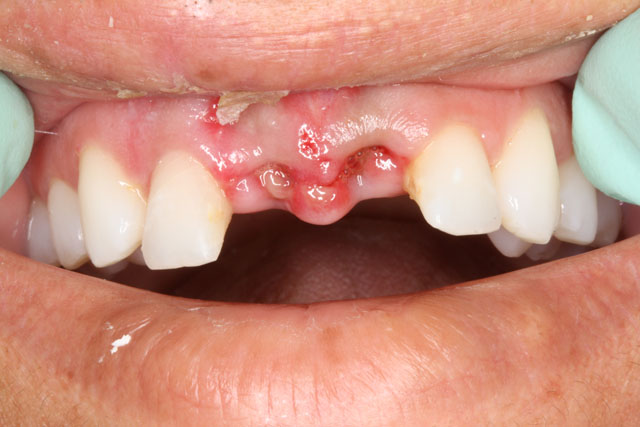
This is how she looked a week after the accident. Looks like #7 has moved.
Now, I had to figure out a way to give her some front teeth quickly. So, I made an impression and poured it up in quick-set stone. Then I took her avulsed teeth and cut off the roots and shaped them to fit onto the model.
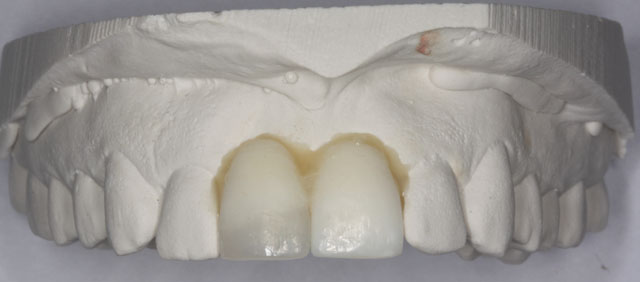
Avulsed teeth were luted to the model with some flowable composite. With the teeth dehydrated, you can see the composite restoration easily. Also note that the Class IV composite restoration SURVIVED the traumatic avulsion!
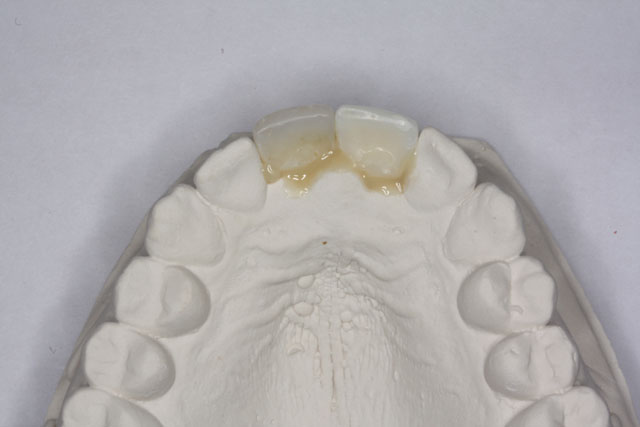
Occlusal view of the model with the natural teeth.
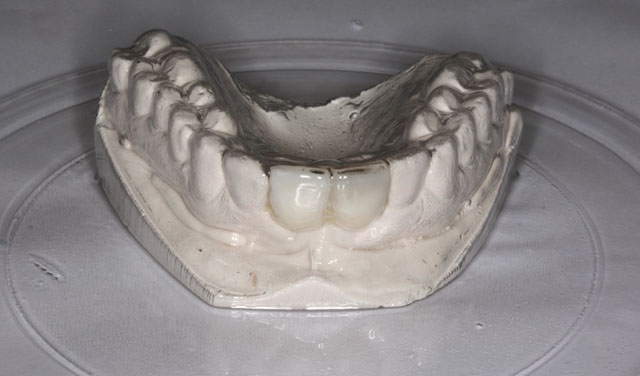
Thermoformed retainer made under pressure with a Ministar.
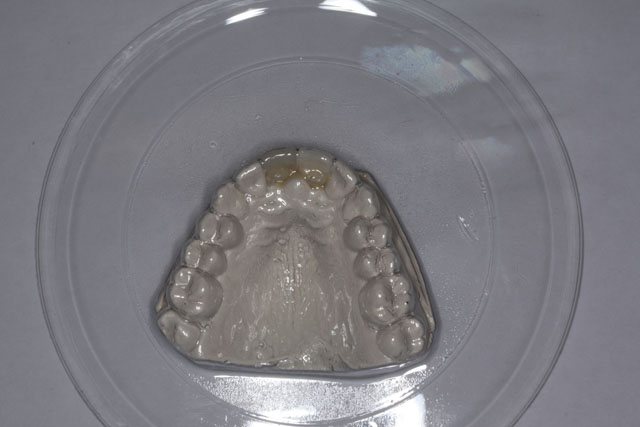
Another view of the retainer before trimming.
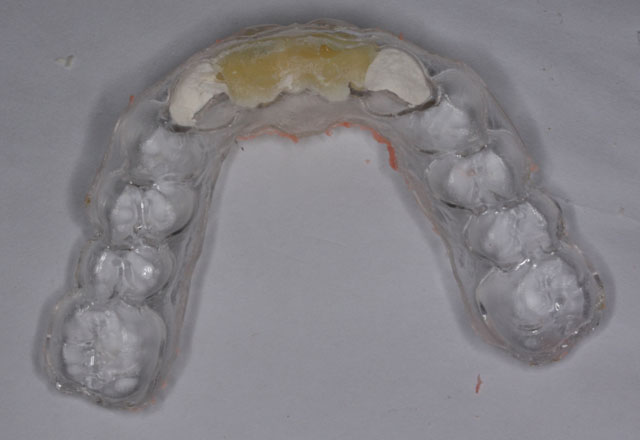
Retainer is cut and separated from the model. The teeth and some of the model have come off in the retainer.
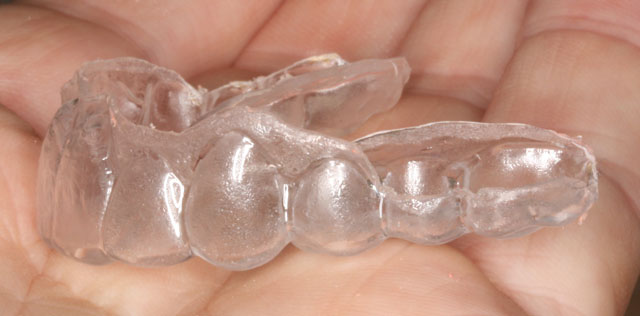
Retainer in my hand. I sometimes trim the 2nd premolar and 1st molar about halfway down on the facial to facilitate removal for the patient.
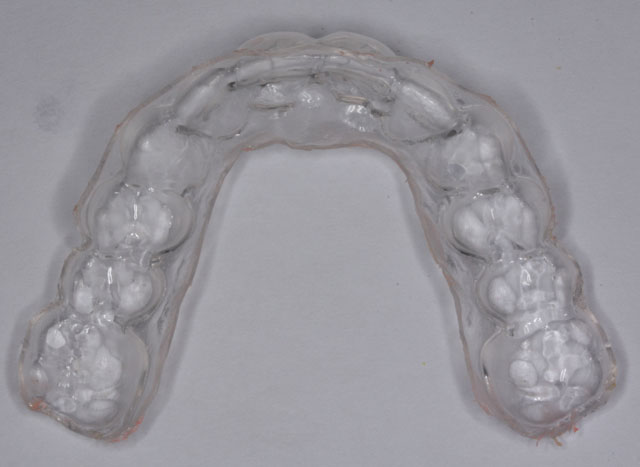
Retainer is trimmed and edges polished.
After verifying it fit in her mouth (I had to anesthetize her), I filled the missing teeth spaces with a hybrid composite and reseated it. Then I removed it and used an explorer to remove the flash. Seated it again confirming that everything was adapted nicely. Then I removed it and cured outside the mouth. I didn’t want to take a chance curing it in the mouth and getting locked in the proximal undercuts of the lateral incisors.
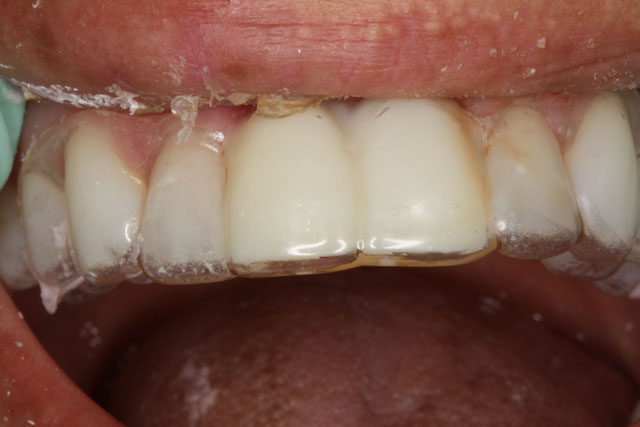
Retainer in the mouth with composite replacing the missing teeth. The “schmutz” you see at the gingival on the left side of the photo is actually her chapped lip sloughing.
It’s not the perfect result, but she was just happy to have something. This was a “quick fix.”
Next I sent her to the periodontist for evaluation for implants. He believes that #7 is a goner, too, and the buccal plate is fractured.
Stay tuned. I’ll do a follow up when we’ve made progress in giving her a long-term result.
 Copyright protected by Digiprove © 2013 The Dental Warrior®
Mike, that is SO sad for her! What the heck, how does this happen to someone time and time again? She must be living kind of a wild life or has the most collosal bad luck! Nice to see how the beautiful resin survived the fall, that’s pretty amazing. Nice temporary fix at least. Wow, I can’t even imagine that happening to me, would be devastated, especially after going through the ortho treatment!
Thanks for chiming in, Nat! 🙂
Yep…. a quick temp… that wasn’t so quick, actually…. busted my butt that day!
Now the real work begins with getting some implants in there and hopefully some nice soft tissue contours.
Beautiful work, and really great pictures! Impressed as usual!
Smile!
Warren
Thanks, Warren! It takes a lot of time and effort to document these cases photographically. But, it’s well worth the effort, I think. 🙂
Awesome job, Mike! (not surprising) Having been through an accident myself, I know how devastating it is. She’s lucky to have you as her dentist guiding her through this!! I’ve done those clear retainers with tooth colored pontics inside as emergency fillins as well. They work pretty well except for when they have to eat!
Thanks, Ger! Can’t really eat with a flipper, either. Sucks both ways. I’m open to suggestions, though! 🙂
AWESOME work! I really sympathize with your case here. I am the only, “specialist GP,” around in a small town, and am associated with a hospital, so I see many fractures, avulsions and intrusions. It’s heartbreaking to see good work get busted, but at least it was by a legitimate accident and not by something like ice or a pencil/pen!
Your photography is amazing. What do you use, and recommend? I have a Canon Powershot, but would like to upgrade to better gear and get some training in intraoral photography.
Please Advise!
-Sherm
Hi Sherman,
Your message got tagged by the spam filter, and I just found it and put it through. Thanks for the compliments!
My photos are taken by one of two cameras: An old Fuji S2 Pro or a newer Canon Rebel XSi. Both are DSLRs with macro lenses and ring flashes. To get really good shots, a DSLR is what it takes. For a great resource on Digital Dental Photography, visit my friend, Dr. Chip Payet’s blogsite: http://www.dentaldigitalphotography.com/.
Mike
I just got these new blue mylar strips that have a stop on the end so they dont pull through, for the life of me I can remenmber the brand (might be garrison) but they are awsome. Very stable and much easier to place. Nice job. Mike Rocks
I need to look at the Vit-L-Essence composite kit. I have been having a lot of MIF, MIFLs come out on me. For my anteriors I am using Esthet.X.
It is frustrating, little MIF and they come off in a year. I’ve checked my light and the output is good. Using Bisco for my bonding. I am begining to hate fixing little chips on the anteriors.
Sounds like it may be occlusion issues to me. Or it could be parafunction. Or both. Or nail biting. Or using teeth to open packages. I’d bet it’s not your bonding agent or composite. As added “insurance,” you could put some extra-long bevels.