It’s been a while since I’ve written, and even longer since I posted a technique / case presentation article.
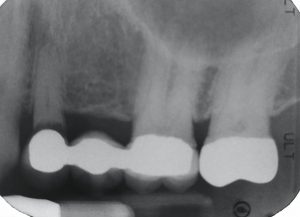
#12 is “FUBAR.” Options were to do a 4-unit bridge or place two implants.
One of my long-time patients had a 3-unit bridge (#12 – 13 – 14) fail due to unrestorable recurrent caries under one of the abutments (#12). He was given the option of an even bigger fixed bridge or two implants and crowns. He decided to go with implants.
I made a pre-op study model, so I could make a Sil-Tec putty matrix. He was referred to a periodontist to extract #12 and section the bridge, saving the existing crown on #14.
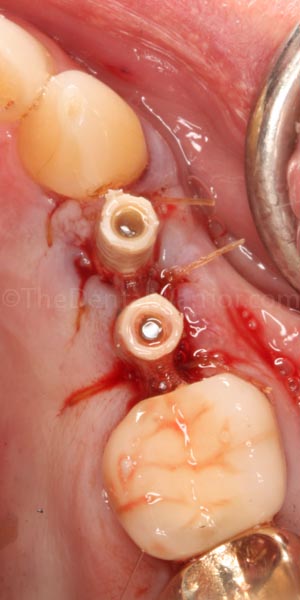
The implants were placed immediately, and the patient came straight from the periodontist to my office. The periodontist had placed two temporary abutments (plastic “PEEK” abutments from Nobel Biocare) and left them long.
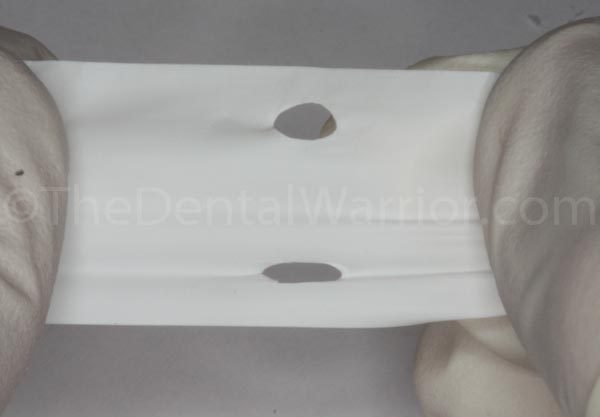
I took a piece of wide Teflon tape and made two holes with a rubber dam hole-punch.
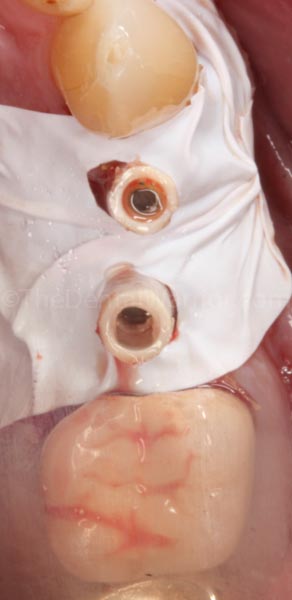
I placed the Teflon tape over the surgical site to prevent locking the bisacryl material (Luxatemp) under the sutures.
I inserted the Sil-Tec putty matrix. It couldn’t be seated all the way, because of the long temporary abutments. I estimated where the abutments impinged on the matrix and removed the matrix. I used my handpiece with a diamond to cut holes in the matrix to allow the abutments to protrude through the matrix and allow complete seating of the matrix in the mouth.
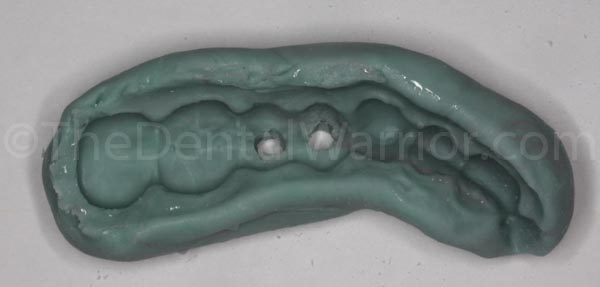
The matrix was re-inserted to verify clearance of the abutments.
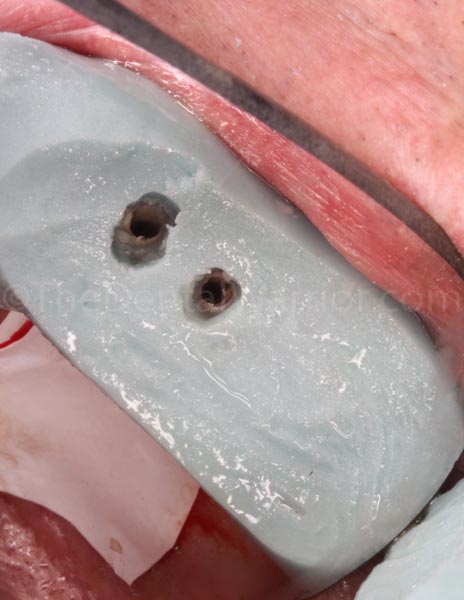
I stuffed some Teflon tape in the abutment screw holes to prevent the Luxatemp material from getting to the screw heads.
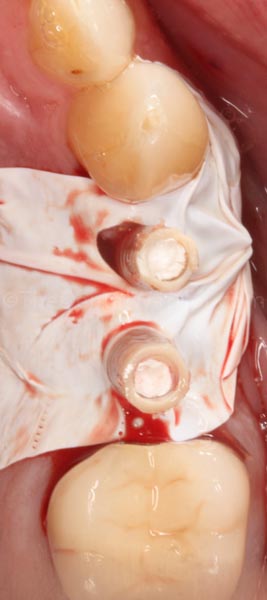
I filled the areas of #12 and #13 in the putty matrix with Luxatemp and seated it in the mouth. Immediately after seating it, I used a microbrush to clean out any excess Luxatemp in the screw holes.
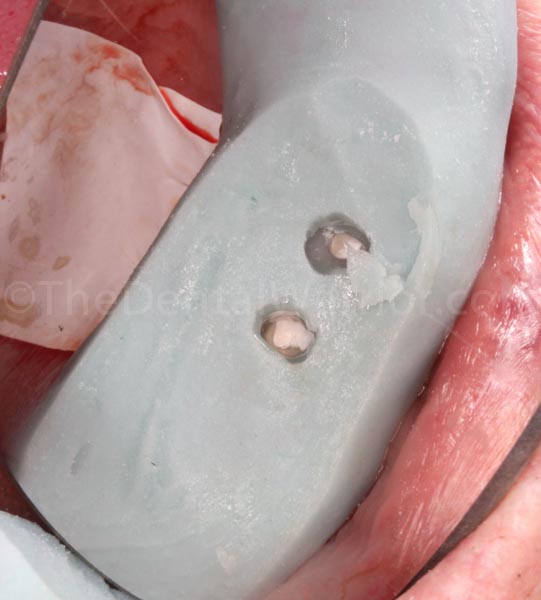
I let the Luxatemp cure completely (3 minutes). I pulled the Teflon tape out of the screw holes. Then I loosened the screws through the matrix. The idea was that I would pull the matrix out with the provisionals still inside.
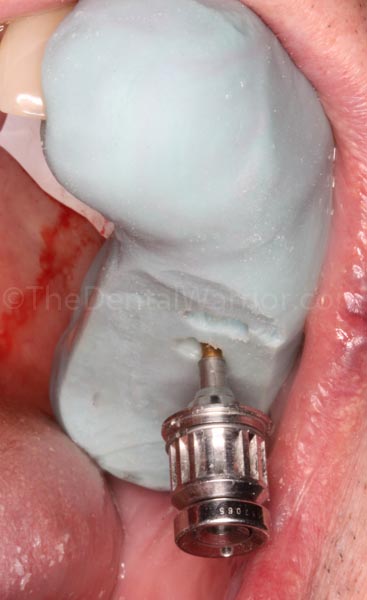
As it turns out, when I pulled the matrix, the provisionals stayed put in the mouth. No worries…. I was able to easily remove the splinted temps with a hemostat and a little wiggling (it was a bit stuck in the proximal areas). Note the “chimneys” formed by the abutments and a bit of extruded Luxatemp.
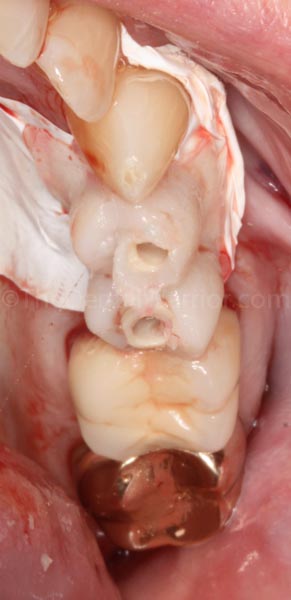
At this point, I could see some voids between the Luxatemp and the abutments in the cervical / gingival aspect.
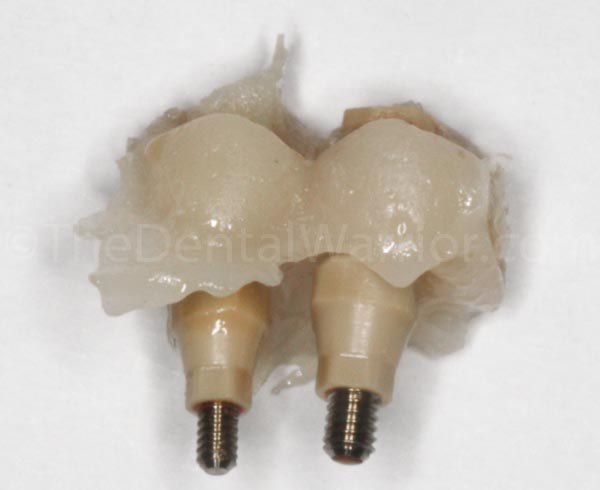
I trimmed the excess Luxatemp with a handpiece, and then I filled the voids with some flowable composite. I shaped and polished to create a nice, smooth emergence profile for both crowns. I also trimmed the excess abutment “chimneys” extending above the occlusal surfaces of the crowns.
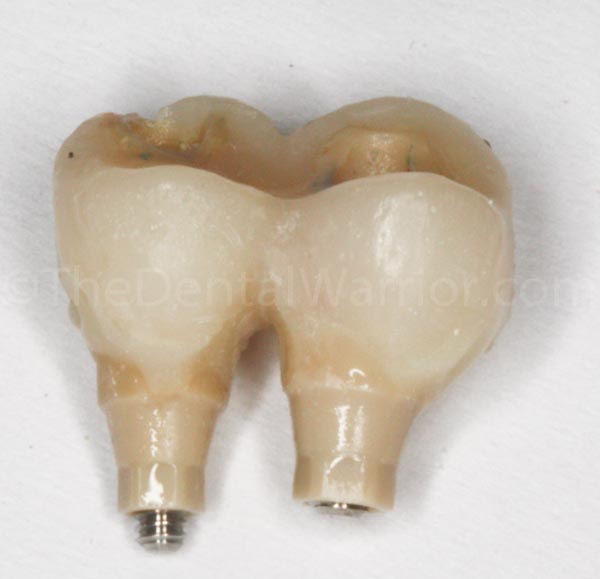
I tried the crowns back in the mouth and adjusted them to be slightly out of occlusion. I also adjusted the proximal contacts to be very light to slightly open, to avoid any forces transmitted from the adjacent teeth via micro-movement.
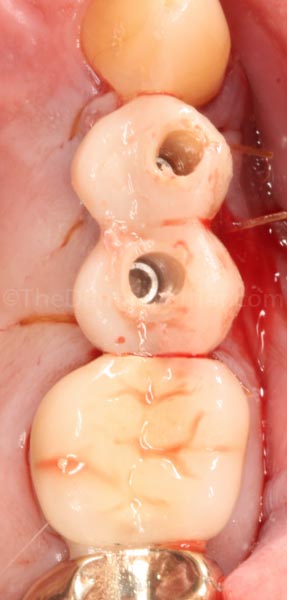
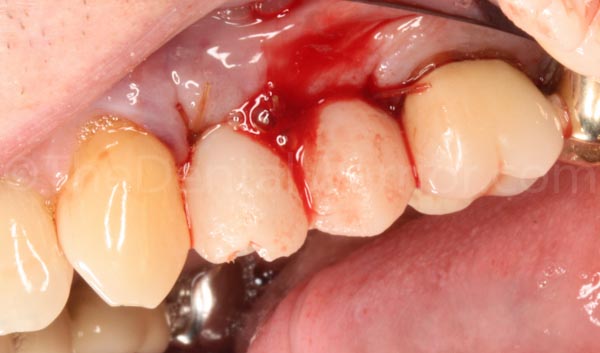
Then I removed them again for some final shaping and polishing.
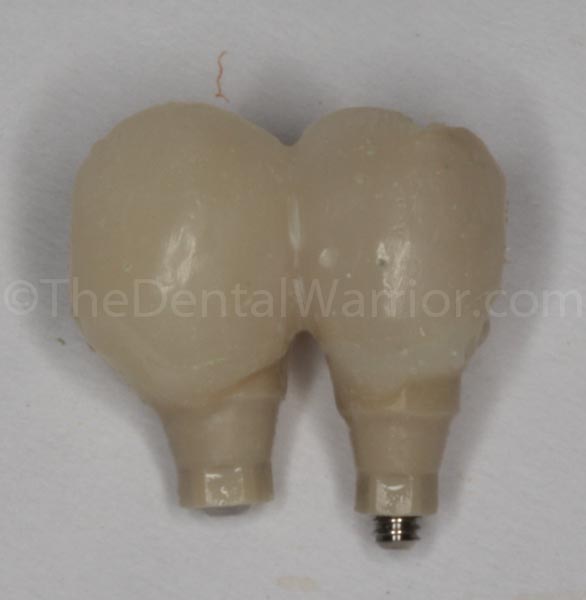
The provisionals were then put back into the implants. Teflon tape was placed in the screw holes. I used flowable composite to “restore” the screw holes.
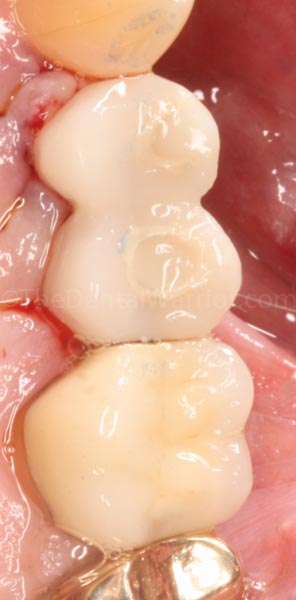
The patient was VERY happy. The advantage of this approach is the lack of cement, easy customization of the emergence profile, and creating a very smooth surface – making for happy gingival tissues during healing. Another plus is that I don’t have to prep the Peak abutments. I find the plastic rather hard to prep and get a good “draw,” especially with multiple abutments that are not perfectly parallel.
Shazam!  Shade is a bit (a lot) light, but no complaints from the patient! I ran out of darker Luxatemp. 😳
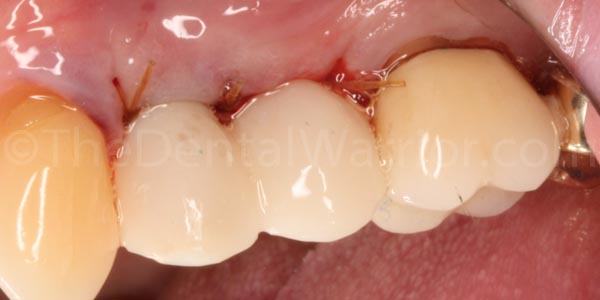
I will follow up with the patient next week, right after he sees the periodontist for his follow-up.
What do you think? Comment below!
 Copyright protected by Digiprove © 2019 The Dental Warrior®
such a good idea with the teflon tape with holes! i usually do the temp material with the matrix putty, just to pick up the temp chimneys and then add flowable to make the emergence profile, but i like your idea better!!
Thanks for visiting my blog and for your comments!
Great job, Mike
Even though I’ve retired from doing
this kind of work, I still appreciate well thought out dentistry
Mike
Thanks, Mike! We’ve gotta get together again, soon!
Will you be posting follow ups on this case? It would be wonderful to see the end result.
Thanks for taking the time and effort to post all of this in detail!
It will be a few months of healing time. I’ll try to remember to post a follow-up. 🙂
Long time lurker, first time commenting. Currently a non-traditional dental school applicant and, I have to say you’ve been an inspiration along the way. Through my years of reading your blog, I’ve always admired how you come up with solutions for your patients and your can-do attitude.
Please post a follow-up! I’d love to see the final result.
Thanks! I delivered the case and forgot to take a photo. But, I’ll be seeing him again soon. Hopefully, I’ll remember to grab a photo.
What is a “non-traditional dental school applicant,” by the way??
your technique recollects a technique to create the hole for the retention screw by drilling through the temporary abutment and up through the crown. Nobel has a long drill for this lab procedure. SEE at 5:17 minutes https://www.youtube.com/watch?v=UqsUo53BGJg
Mike–
When you have the temporary abutments out of the mouth, are you concerned about the “hole” down to the head of the implant collapsing or closing up and making it difficult to reinsert the abutments? Also, I like your idea of placing Teflon over the sutures–much better than the old way of using a rubber dam.
I’ve heard of tissue collapse happening, though I’ve not seen it happen…. at least not within the time frame of the procedure I’m doing… or at least not enough to cause a problem for me. Yet! 🙂